- Published on
N-Day Research with AI: Using Ollama and n8n
Research Background
I have been working on N-day research for the past year, focusing specifically on Microsoft components. During this time, I developed several tools to support and streamline my research. Some of these tools include:
- Diffrays - https://github.com/pwnfuzz/diffrays
- It leverages IDA Pro and the IDA Domain API to extract pseudocode of functions and perform structured diffing between patched and unpatched binaries.
- WinDriver-EXP - https://github.com/ghostbyt3/WinDriver-EXP
- This repository includes PoC exploits for vulnerabilities in Windows drivers, showcasing flaws that can result in privilege escalation, arbitrary code execution, or other security risks.
- Ghidra-Headless-VT - https://github.com/ghostbyt3/ghidra-headless-vt
- Simple Python scripts to automate Ghidra's version tracking from the command line.
- Nday-Automation - Private
- This utilizes the MSRC API to find specific components, runs Ghidra Headless VT, generates a report, and sends it to Notion for further manual analysis.
Since there is a growing trend toward AI-driven analysis, I wanted to evaluate whether an AI model could analyze patched and vulnerable functions and independently identify the underlying vulnerability. This approach could be especially useful for initial triage and enabling faster analysis.
So, I decided to experiment with the tools I already have and extend my workflow further. I started by deploying a local LLM and building from there.
Local LLM Setup
It is pretty easy to deploy a local LLM with Docker and Ollama, this is not a guide but it might help to get start with it. Also, choosing a proper model is based on your machine. Having a powerful GPU gives you better LLM to be run locally.
Let’s start with installing Ollama in docker.
docker run -d -v ollama:/root/.ollama -p 11434:11434 --gpus=all --name ollama ollama/ollama
Verify if Ollama is installed properly in docker.
> docker exec -it ollama ollama help
Large language model runner

Usage:
  ollama [flags]
  ollama [command]

Available Commands:
  serve       Start Ollama
  create      Create a model
  show        Show information for a model
  run         Run a model
  stop        Stop a running model
  pull        Pull a model from a registry
  push        Push a model to a registry
  signin      Sign in to ollama.com
  signout     Sign out from ollama.com
  list        List models
  ps          List running models
  cp          Copy a model
  rm          Remove a model
  launch      Launch an integration with Ollama
  help        Help about any command

Flags:
  -h, --help      help for ollama
  -v, --version   Show version information

Use "ollama [command] --help" for more information about a command.
Then you can start pulling models and run it locally:
> docker exec -it ollama ollama pull <model_name>
For a decent machine you can start with qwen3:4b-q4_K_M model which has 4 billion parameters, this determines the size of a model.
> docker exec -it ollama ollama pull qwen3:4b-q4_K_M
Short explanation about size of a model:
The size of a model directly affects its capabilities and requirements. Larger models usually know more, are better at reasoning, and are more accurate, but they also require significantly more compute power and memory to run. In contrast, smaller models run faster, can work on local machines, use less RAM and GPU, and are cheaper to deploy, making them more practical for lightweight applications or situations with limited hardware resources.
You can view the list of pulled models:
> docker exec -it ollama ollama list
NAME               ID              SIZE      MODIFIED
qwen3:4b-q4_K_M    2bfd38a7daaf    2.6 GB    11 days ago
There are two ways to use the local LLM,
- First method is using cli
> docker exec -it ollama ollama run qwen3:4b-q4_K_M
>>> hi
Thinking...
Okay, the user sent "hi". I need to respond appropriately. Since they just said "hi", a friendly greeting is
needed. Maybe start with a simple "Hello!" and ask how I can assist them. Keep it open-ended so they can tell me
what they need. Make sure the tone is warm and welcoming. Let me check if there's any specific context I should
consider, but since there's no prior conversation, just a standard greeting should work. Alright, time to send the
response.
...done thinking.

Hello! How can I assist you today? 😊

>>> Send a message (/? for help)
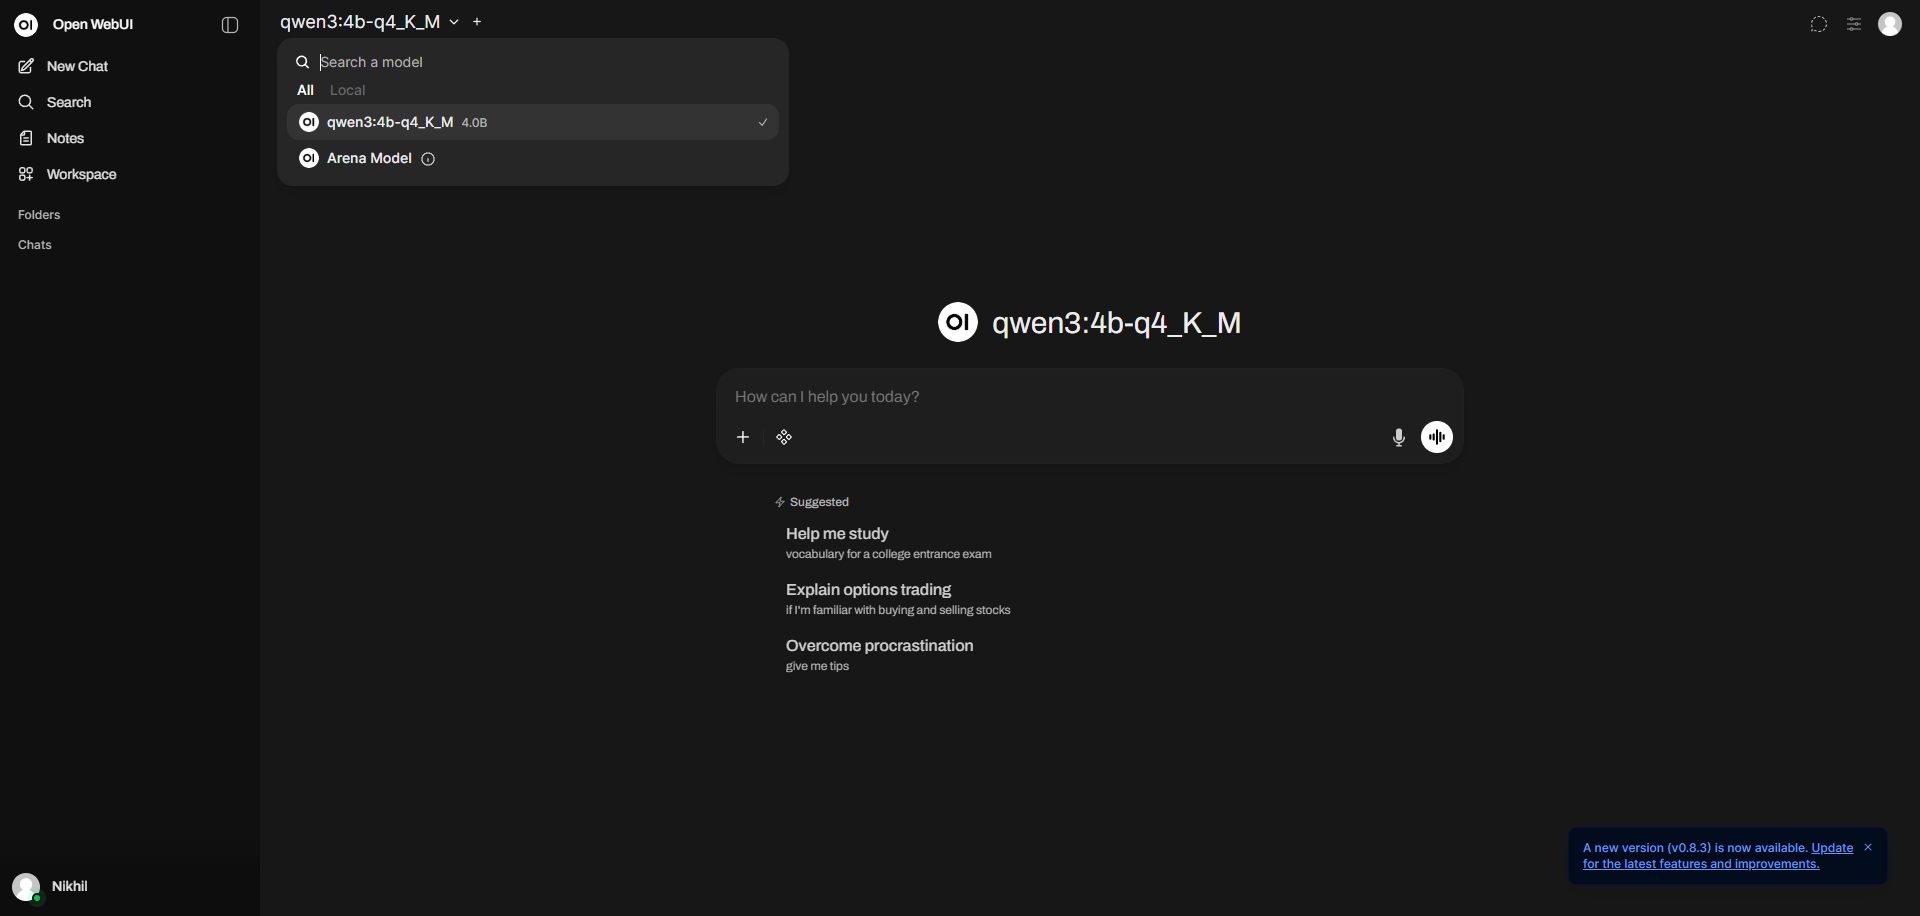
- The another method is using open-webui, which can also be deployed in docker.
docker run -d -p 3000:8080 -v open-webui:/app/backend/data -e OLLAMA_BASE_URL=http://host.docker.internal:11434 --name open-webui --restart always ghcr.io/open-webui/open-webui:main
Then you can choose the model and use it from web ui and start using it.
Extending the Research Pipeline with AI
Now that local LLM is up and running, the next step is to link up my current set of automations to AI and give proper prompt to analyze them and generate a final report. To do these tasks, I decided to try n8n, why n8n? It is a powerful, low-code, open-source workflow automation tool that allows users to connect, integrate, and automate tasks between different apps, databases, and AI models via a visual interface. as I have also heard lot of positive things about it.
Setting up n8n
Running N8N is also pretty simple in docker as well, using the below DockerFile:
FROM docker.n8n.io/n8nio/n8n:latest

USER root

# Install the patched ollama langchain package
RUN mkdir -p /opt/extra \
 && npm --prefix /opt/extra install @langchain/ollama@1.0.3 \
 && OLLAMA_UTILS_PATH=$(dirname "$(find /usr/local/lib -name utils.js | grep ollama)") \
 && cp /opt/extra/node_modules/@langchain/ollama/dist/utils.* "$OLLAMA_UTILS_PATH"/ \
 && chown -R node:node /opt/extra

USER node
Build and run it:
docker build -t n8n
docker run -it --name n8n `
  -p 5678:5678 `
  -v C:\patchdiff\n8n-data:/home/node/.n8n `
  -v C:\patchdiff\workspace:/home/node/.n8n-files `
  n8n
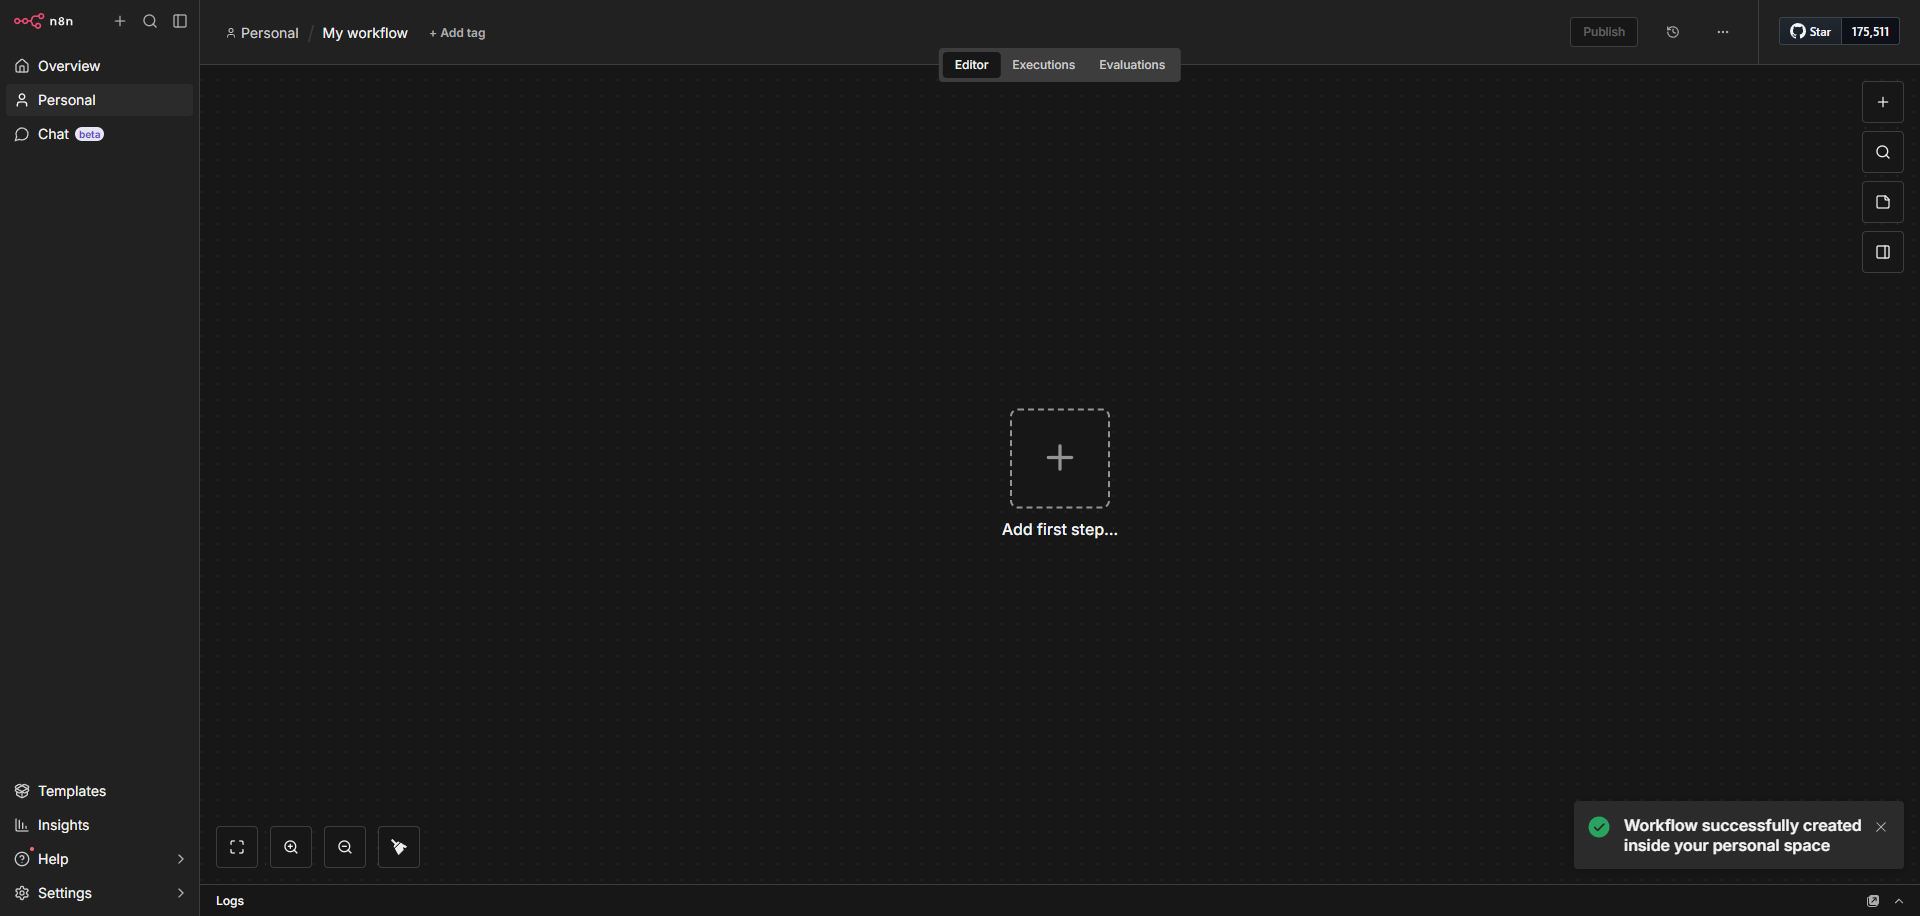
Now it’s up and running on http://localhost:5678/. This is what you will see, where you can add nodes and connect them with other nodes to make a flow.
The next step is the implementation of my plan. My current setup consists of nday-automation.py that uses headless Ghidra to perform the analysis and run version tracking. Further, it extracts the patched and vulnerable functions. All that was left to do is chain everything together, feed the extracted information to N8N and use AI to analyze these functions and find vulnerabilities.
This did not start with a structured plan. As I continued experimenting, I realized how useful a Retrieval-Augmented Generation (RAG) setup could be for this workflow. So, I decided to integrate a RAG pipeline as well to improve the model’s ability to retrieve relevant context and enhance its analysis.
Basically I fed my own notes from previous research work, publicly available blog posts and RSS links of sites where you could frequently find posts about Windows research. The extracted information from all these resources are stored in Qdrant Vector Database that will be used by the model to generate smarter and more accurate analysis.

Deploying the Qdrant Vector Database
Let’s understand a bit of basics about the concepts.
What is RAG?
Retrieval-Augmented Generation (RAG) is an AI framework that improves the accuracy and reliability of Large Language Models (LLMs) by retrieving relevant, up-to-date information from external sources—such as internal documents, knowledge bases, or databases—before generating a response. Instead of relying only on its training data, the AI searches these sources for useful context and uses that information to produce more accurate and grounded answers. In short, you give the AI your own data, it organizes and searches through it when needed, and then uses the most relevant information to give better and more accurate answers.
What is Vector Database?
A Vector Database is a special type of database that stores data in a way AI models can understand and search based on meaning, not just exact words. Instead of saving only text, it converts information into numbers (called vectors) that represent the meaning of the content. This allows the AI to find similar ideas even if the wording is different.
In simple terms, it helps the AI search for information based on context and similarity, which makes systems like Retrieval-Augmented Generation (RAG) much more accurate and useful.
Imagine you have a customer support chatbot for an online store. You upload all your product guides, return policies, and FAQs into a vector database.
Now a customer asks, “Can I send back something if it doesn’t fit?”
Even if your documents only say “You can return items within 30 days if the size is incorrect,” the vector database understands that these mean the same thing. It finds the right information and gives the chatbot the correct answer.
So instead of matching exact words, the AI understands the intent and meaning, which makes the chatbot much more helpful and natural.
Qdrant is a vector database tool that stores and searches data based on vectors (numerical representations of meaning). There are a few other similar tools, such as Pinecone and Weaviate. In order to store data in a vector database, you need an embedding model to convert text, images, or other types of data into vectors.
You can simply spawn a Qdrant vector database in docker as well by running:
docker run -it --name qdrant `
  -p 6333:6333 `
  -v C:\patchdiff\qdrant_storage:/qdrant/storage `
  qdrant/qdrant
Once it’s up and running, you can access the dashboard: http://localhost:6333/dashboard#/welcome
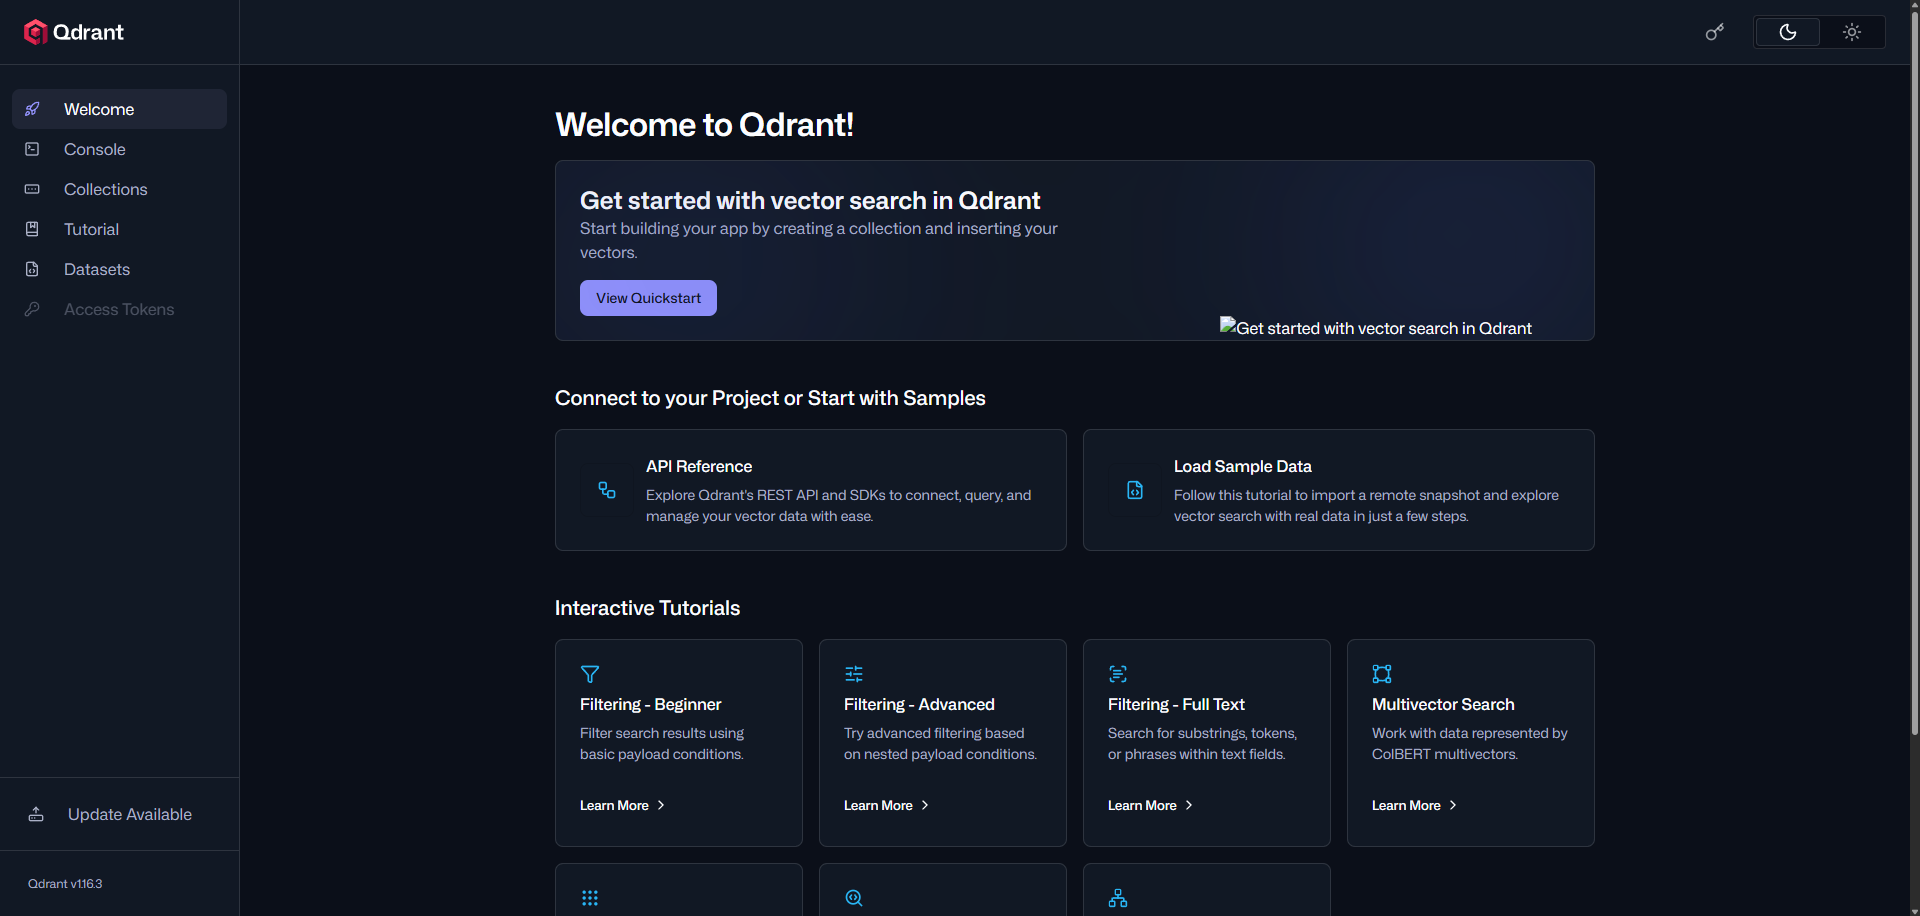
Collections are where the vector database stores the information you provide. A collection is similar to a table in a traditional database, where related data, vectors, and metadata are organized and stored together.

Automated Vulnerability Analysis with AI
Initially, I started with a very simple workflow. I used a webhook trigger to send all the collected information, where my nday-automation.py script sends the patched and vulnerable functions along with all the relevant metadata to n8n. After receiving the data, n8n performs some parsing and forwards it to the AI agent. This agent is connected to my local Ollama model, qwen3-coder:30b. I chose a larger model to ensure better context handling and improved reliability.
What is Context Length?
The context length (sometimes called the “context window”) is the maximum amount of text the model can consider at once when generating a response. Bigger models usually have a longer context window, which means they can handle more information in a single prompt or conversation.
- Smaller models → shorter context, may “forget” earlier parts of the conversation.
- Bigger models → longer context, can maintain more information and give more coherent, reliable answers.
For example, a 7B model might handle 2,000 tokens of context, while a 30B model like qwen3-coder:30b could handle 8,000–16,000 tokens (depending on implementation), letting it process longer documents or complex instructions in one go.
Context length is measured in tokens, not words or characters. A token is a chunk of text that the model uses as a unit. Usually, tokens are roughly 1–4 characters in English.
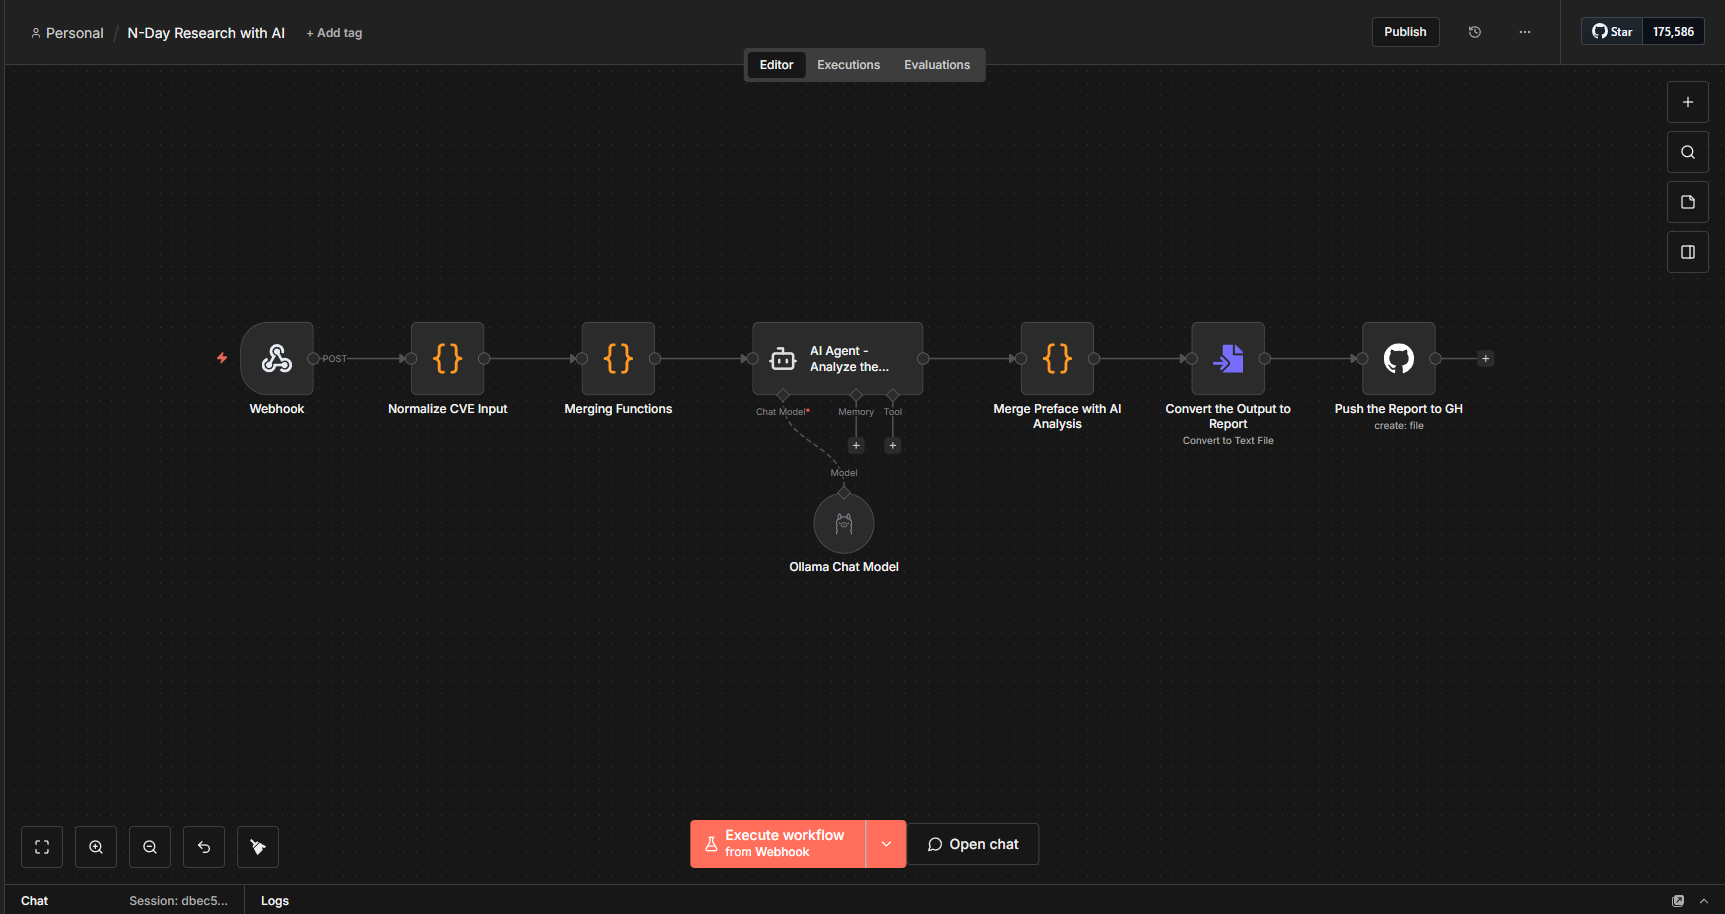
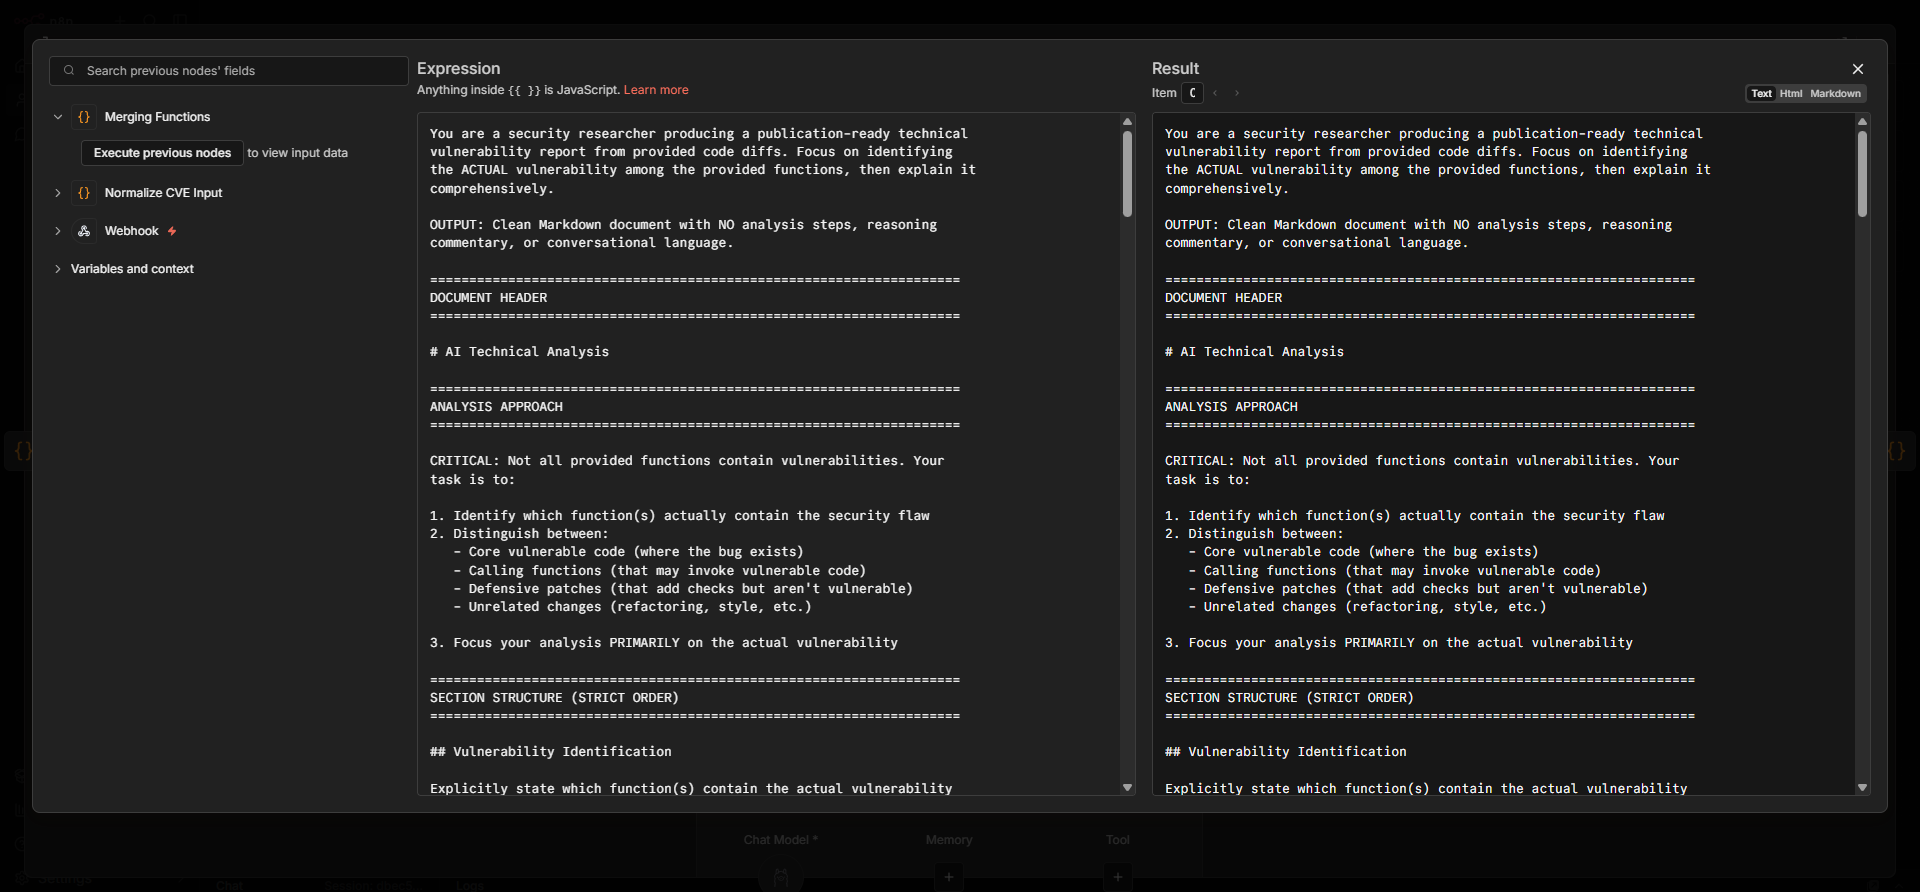
Prompt plays a major role, so I provided a huge prompt which explains what it needs to do and how the report should be structured and other details that we will need to have a comprehensive report. Once the report is generated the Preface data (which is nothing but basic binary information, patched functions, new functions metadata) will be prepended to the report generated by AI and it will be pushed to my Github repo.
Building the RAG Pipeline
As already discussed regarding RAG and vector databases, we will now set them up and begin feeding data into the system. During my research, I read multiple blog posts on different CVEs and created my own notes. I decided to store all of this information in a vector database. Since the overall goal of this approach is to eliminate as much repetitive manual work as possible, I also automated the entire process.
It might look a bit confusing at first, but the overall setup is actually quite simple. I configured three main input nodes in n8n:
- RSS Feed ingestion from various security and research blogs
- URL submission for manually adding specific sources
- File upload for directly processing documents
For the first two sources (RSS and URLs), the workflow performs a GET request to retrieve the HTML content. As expected, the response contains a lot of HTML tags and unnecessary elements. To handle this, I pass the content to an AI Agent (which I call the Document Processor) with a carefully designed prompt. The agent:
- Removes irrelevant HTML tags, scripts, and noise
- Extracts meaningful and structured content
- Converts the raw data into a clean and readable document
The processed document is then sent to the Qdrant vector store.
As mentioned earlier, an embedding model is required to store and retrieve data effectively from a vector database. For this, I am using the qwen3:embedding model locally via Ollama.
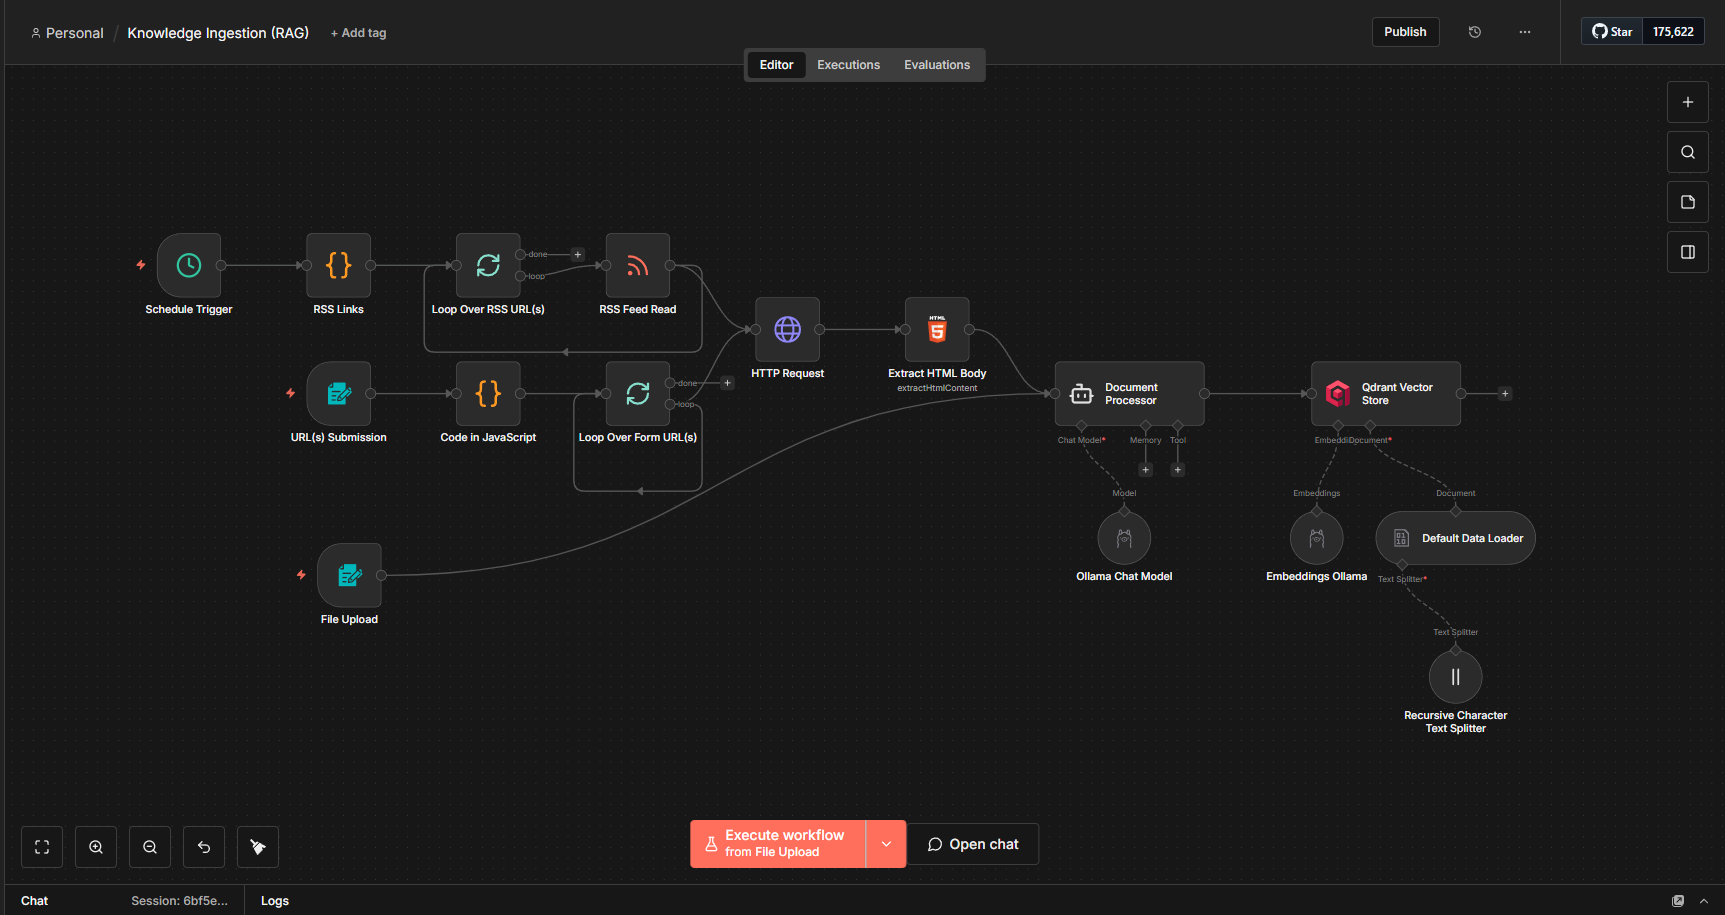
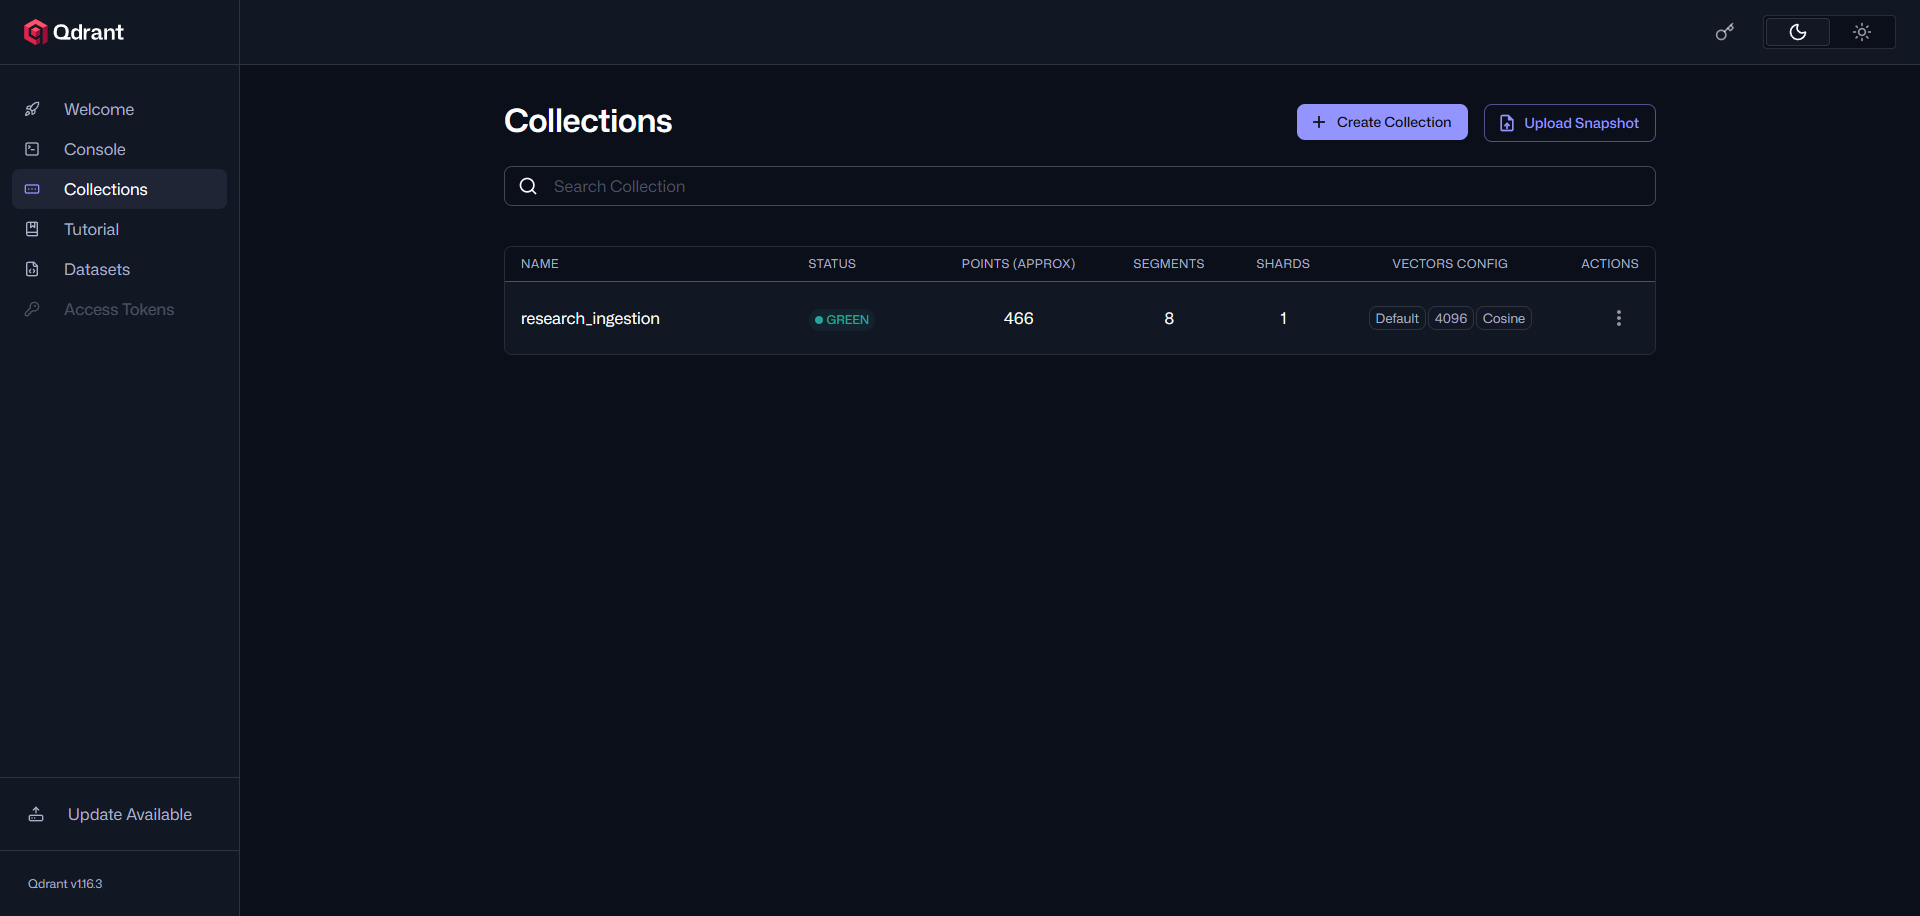
The ingested data can be viewed from the dashboard as well:
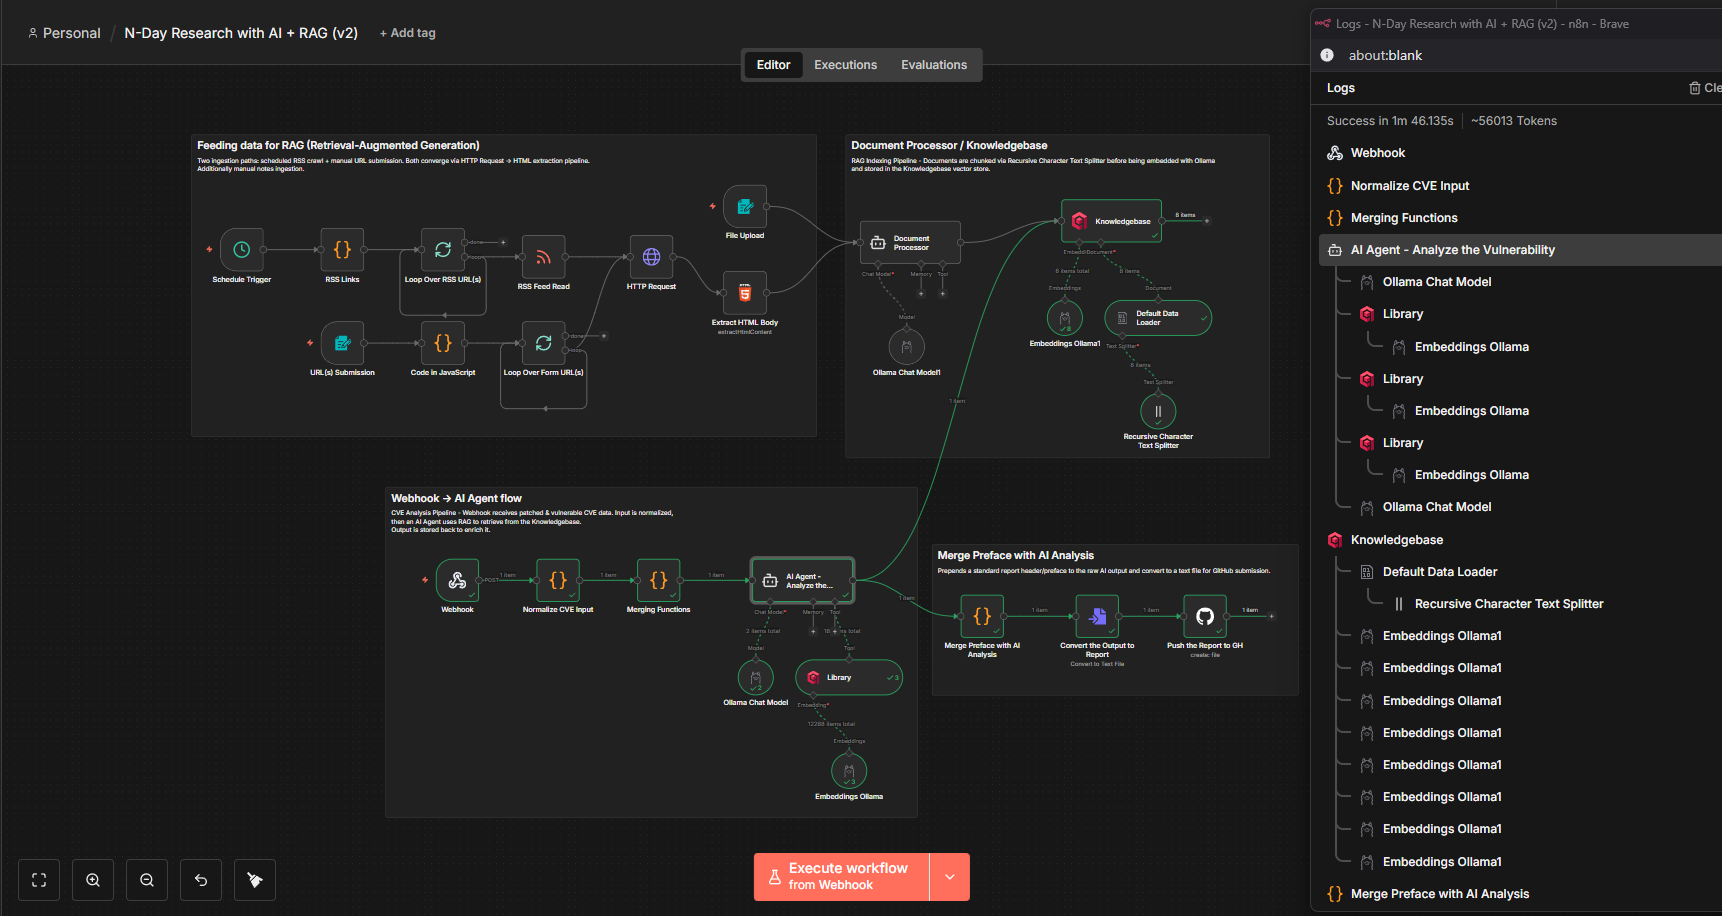
Bringing It All Together
Now with everything in place, I just need to glue them all together, resembling the original vision we had.
Initial phase involved scraping and feeding data to my “Knowledgebase” (Vector database). Next phase awaits for any webhook input data which is later sent to our local AI Agent and I instructed to use the “Library” (same Vector database) to see if it can get any information. I had some issues to make it use the vector database but after figuring out the correct prompt, it works fine, and once the report is generated it goes to the “Knowledgebase” to further improve it and the report is exported to GitHub.
As with every automation, there are some limitations in my current setup. When I prompt the AI, I also provide the full unified diff of the patched and vulnerable functions, along with any newly added functions. This consumes a large amount of the available context length, which is expected.
To manage this, I had to limit my prompt to around 20k tokens so that the model can use the remaining context window for reasoning, report generation, and other outputs. To achieve this, I used the tiktoken module to calculate the token length and removed some patched functions before sending the data to n8n. As a result, this approach may occasionally miss the actual vulnerable patched function.
Final note, the generated reports are not always completely accurate, which is expected when working with AI. However, the goal is to use this as a starting point to accelerate the research process rather than relying on it as a final source of truth.
I have made the GitHub repository publicly accessible, so you can find the reports here: https://github.com/ghostbyt3/nday-automation-ai.
I am planning to continue running this for every Patch Tuesday and maintaining this repository for now.
Key Takeaways
The current setup works pretty well, and I’ve learned a lot about local LLMs and some of the underlying concepts, which was both challenging and interesting.
Experimenting with n8n and integrating it with AI has been a lot of fun. Since it’s a low-code platform, it’s relatively easy to set up and get started, even if you’re new to this kind of workflow. I’m still exploring new ideas and use cases, and I’d definitely recommend giving it a try yourself, you might be surprised at how quickly you can get things running.
If you have any feedback, suggestions, or questions, I’d love to hear from you, feel free to reach out!