- Published on
Kernel Exploitation Primer 0x6 - Streamlined Windows Environments for Vulnerability Research
To learn and reproduce previous Windows vulnerabilities, it’s relatively easy if it’s just an application or if the target version is only one Patch Tuesday release behind. But what if the entire Windows driver or ntoskrnl has changed significantly? Downgrading Windows can be difficult, you might manage it for a few recent updates, but not for major version changes, like from 2025 to 2024 updates. The best approach is to download the specific Windows version that contains the vulnerable driver or service. While it might seem easier to just replace a single driver with a vulnerable one, I doubt it would work perfectly, since the latest version of Windows may include updates or new features that the older driver isn't compatible with.
The best solution I can think of is to get the vulnerable build itself, and that’s exactly what I’m going to do. In this chapter, I will showcase how I usually download old Windows builds and how to easily set them up in a virtual machine with just a few clicks, instead of going through multiple on-screen installation steps.
Table of Contents
Downloading Windows Build
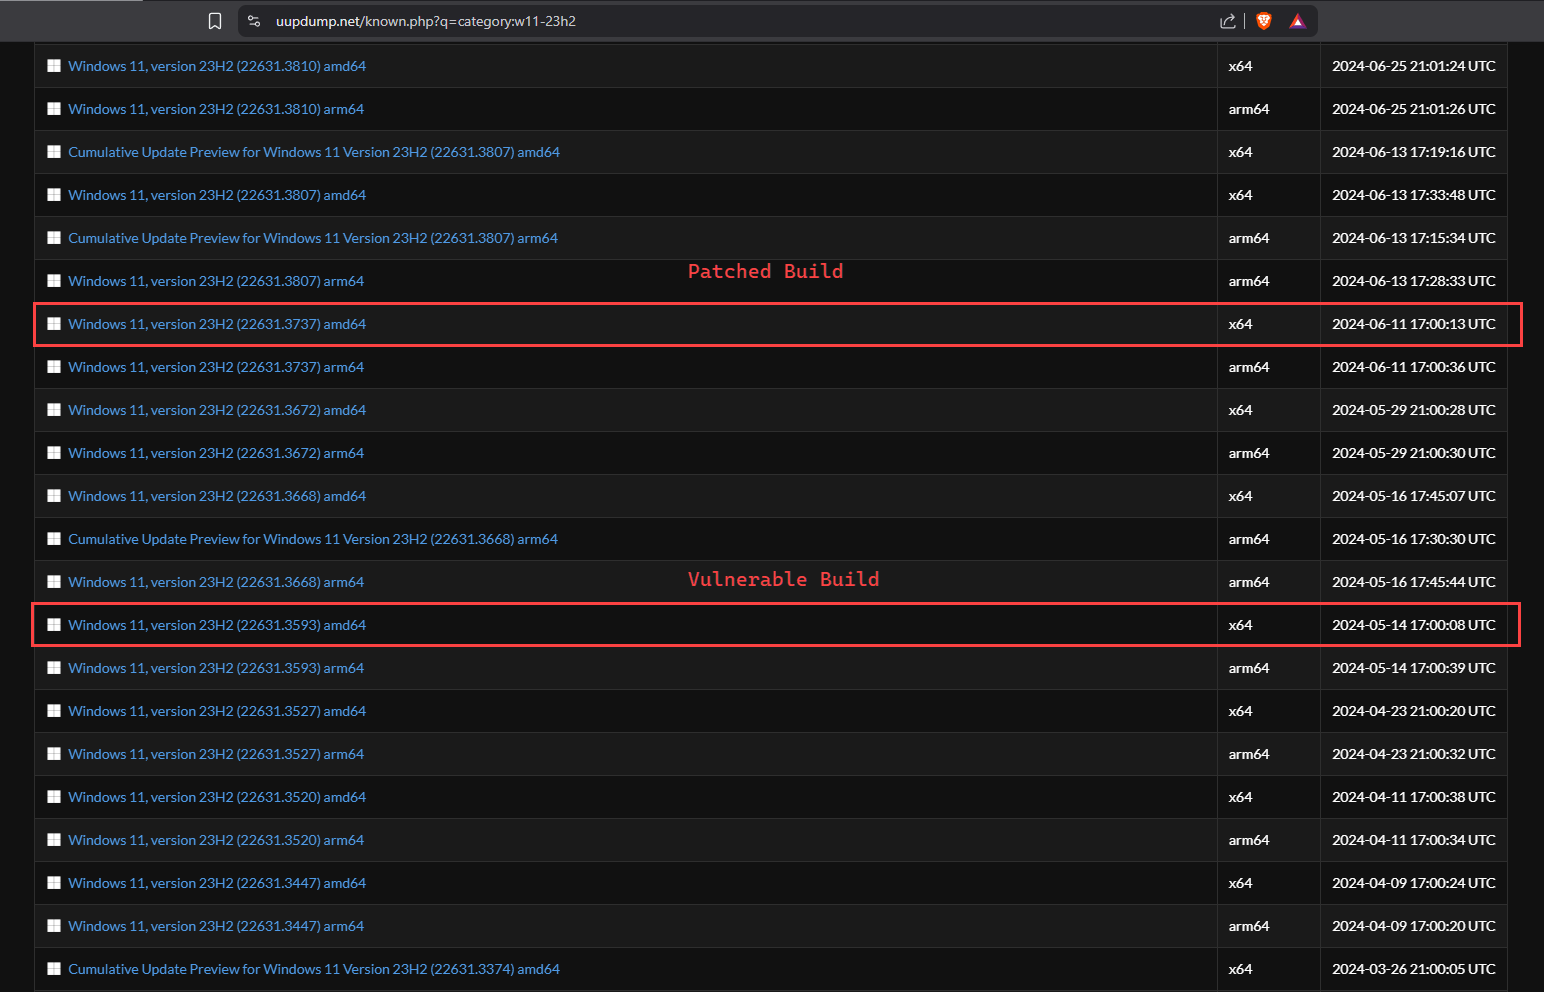
To begin, I need to pick a CVE, I've chosen CVE-2024-35250. Starting with MSRC, it states that this vulnerability was addressed in the June 2024 Patch Tuesday update.
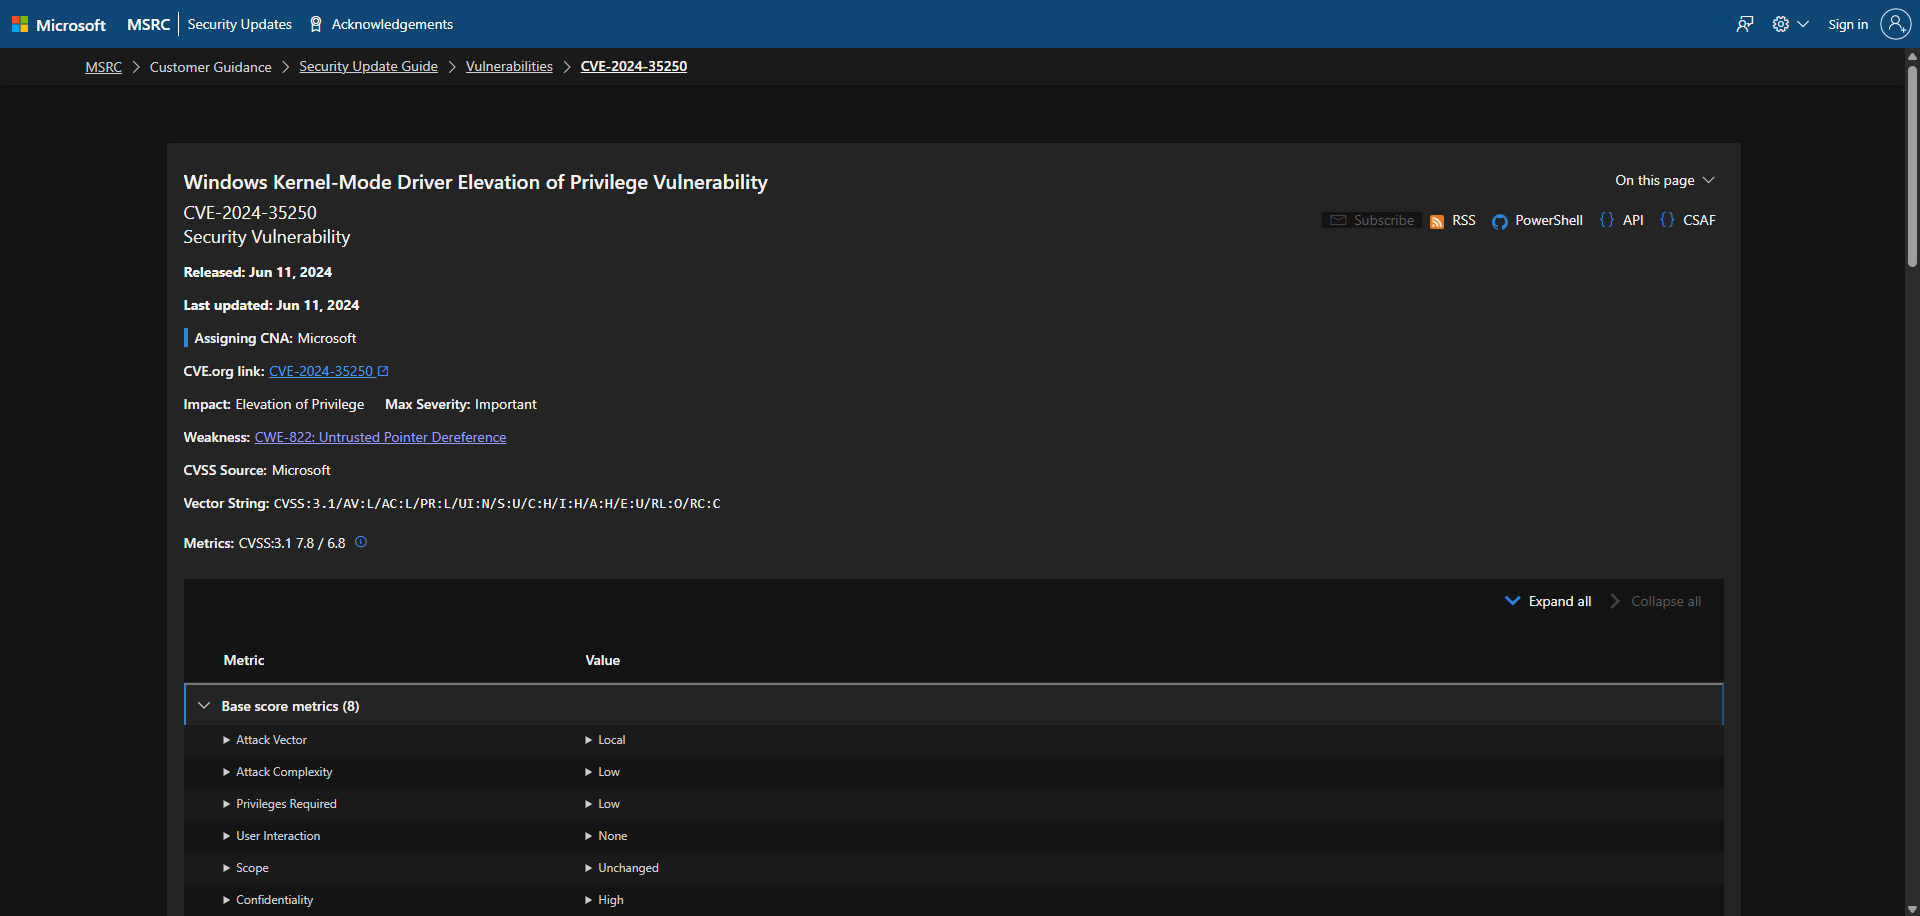
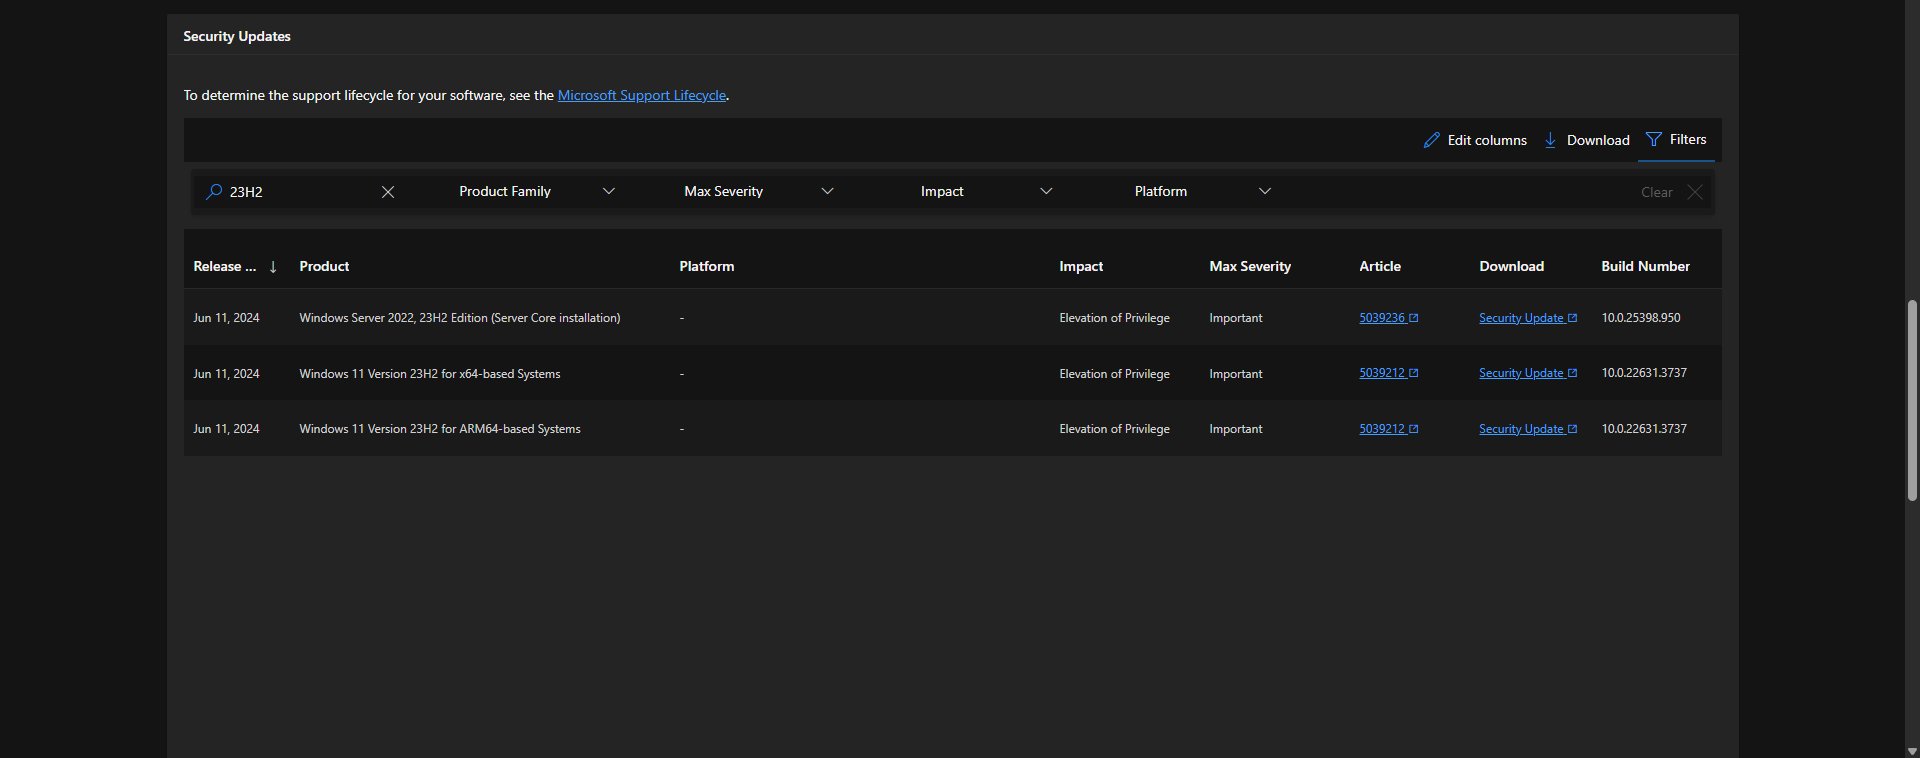
Checking the security updates, I am planning to replicate this in Win11 23H2 so I filtered that and we can now see the patched versions. The KB is 5039212 and the Build number is 10.0.22631.3737.
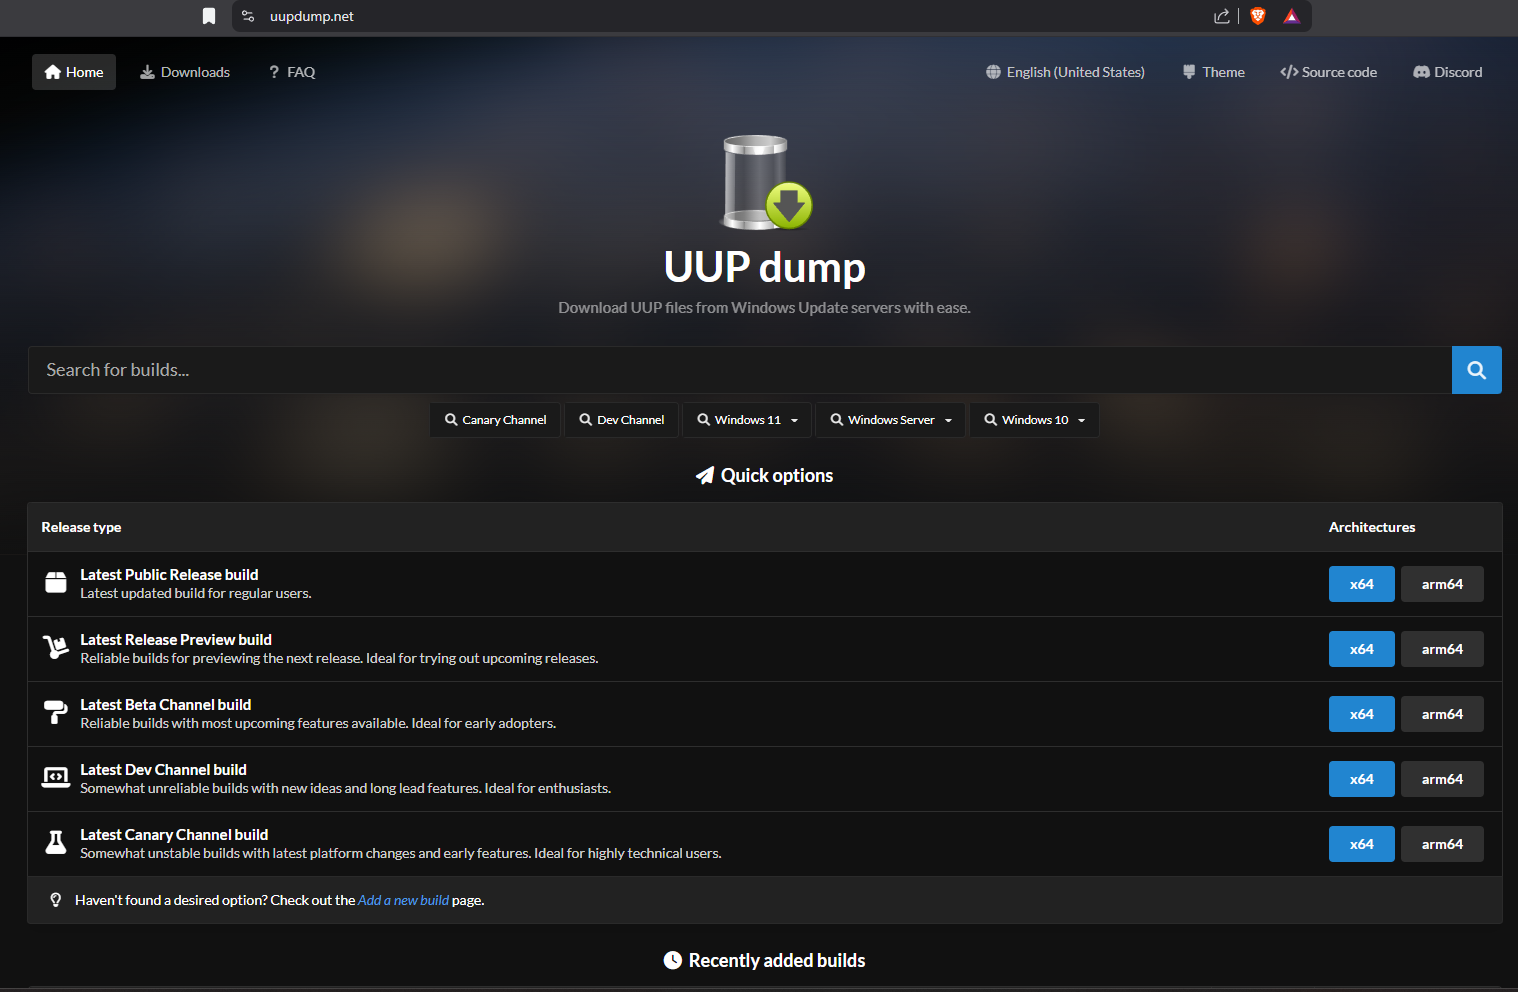
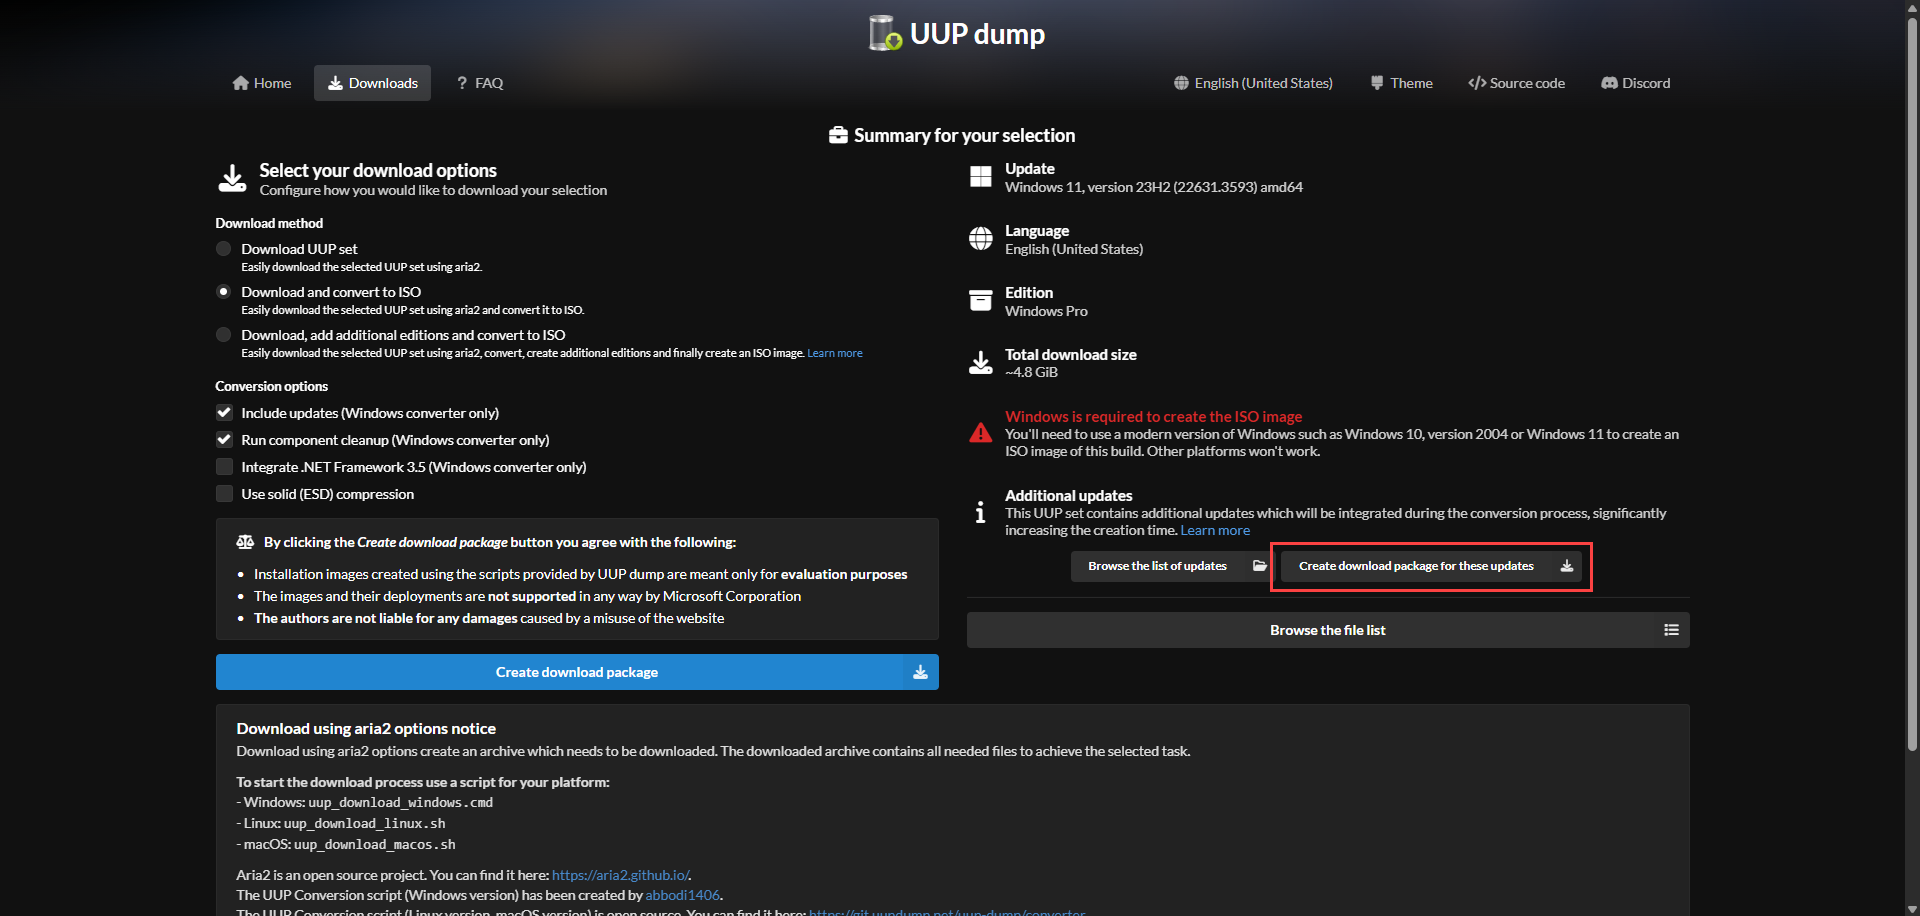
Now I need to download the Windows 11 23H2 that is prior to this (10.0.22631.3737) build number. This can be done via https://uupdump.net/.
Source: https://www.hawkdive.com/uup-dump-how-to-download-windows-insider-iso-files-step-by-step/
UUP Dump is a community-driven tool that allows users to download Unified Update Platform (UUP) files directly from Microsoft’s servers and then convert them into ISO files. The UUP format is used by Windows Update to deliver feature updates and Insider Preview builds to users. UUP Dump simplifies this process by making it possible for anyone to access these updates manually and convert them into an ISO for installation.
Just add a filter for Windows 11 23H2 and it gets all the build versions.
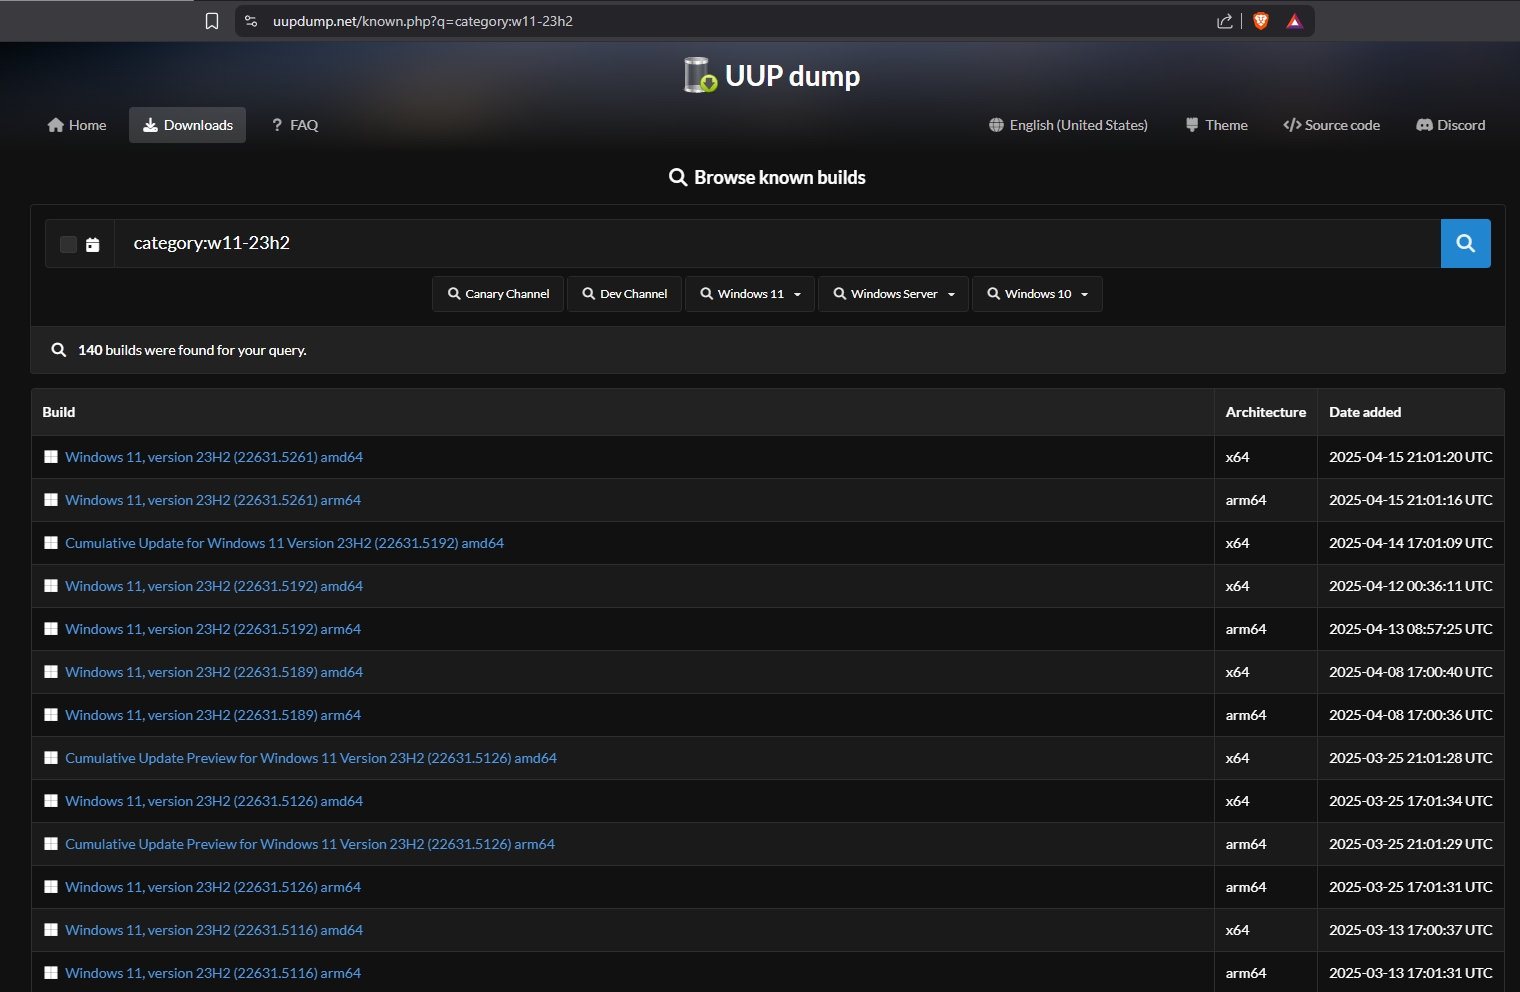
Now that we know the patched build number is 10.0.22631.3737, I just picked the build before June’s Patch Tuesday which is 10.0.22631.3593.
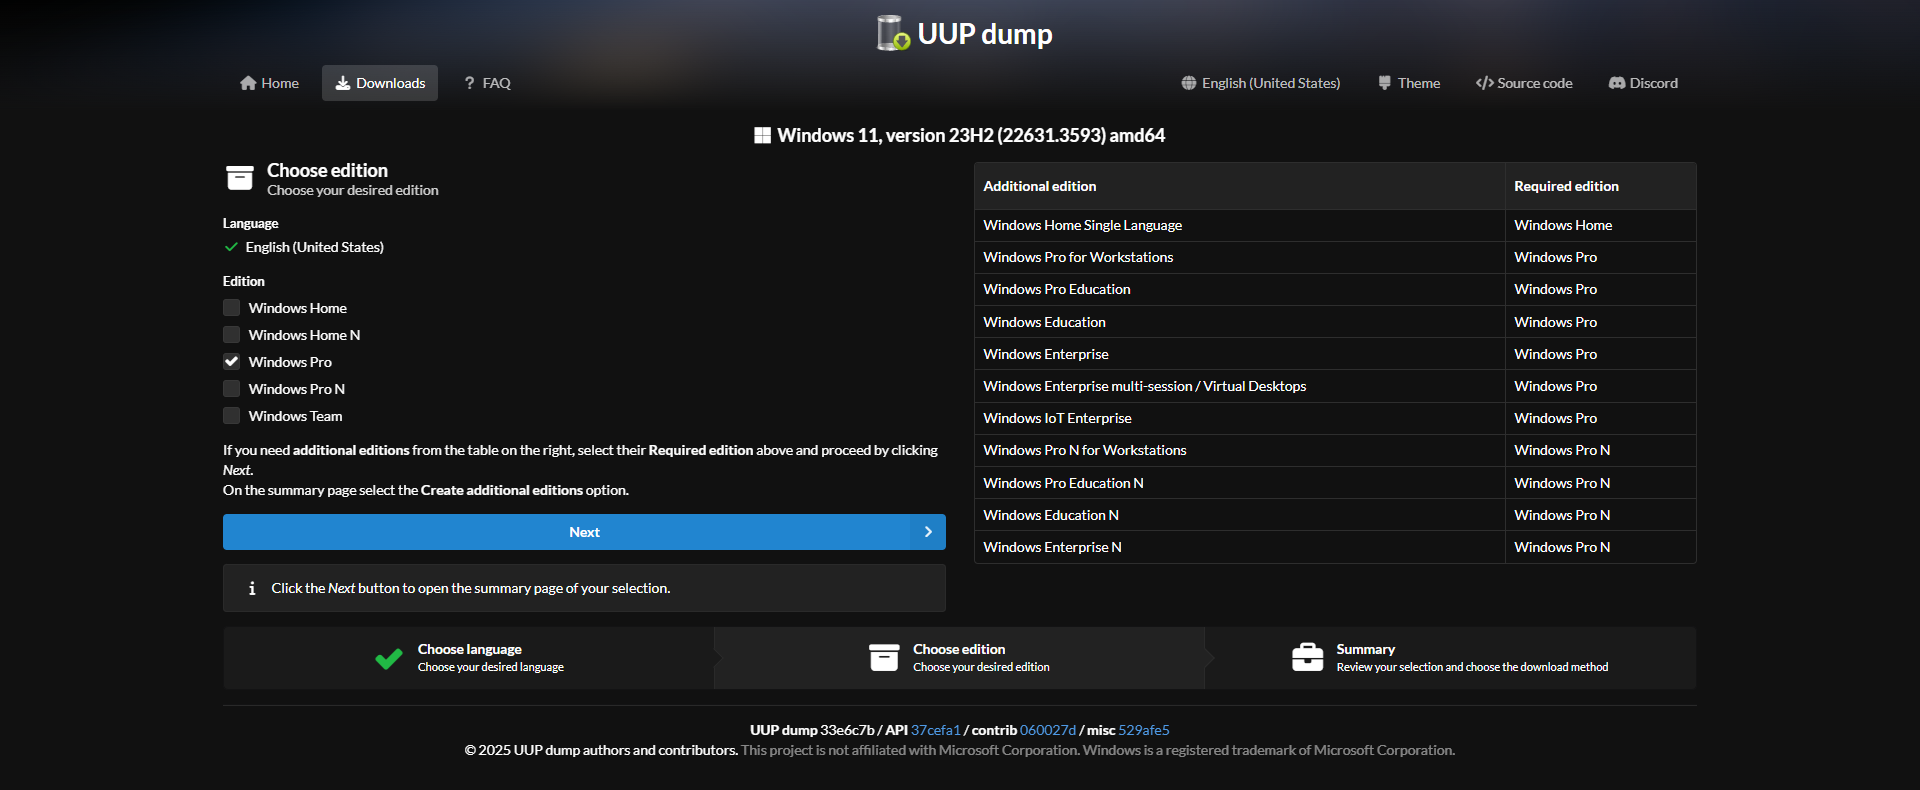
I choose 10.0.22631.3593 and choose the langugage and Next.

I just need Windows Pro, so deselect others and Next.
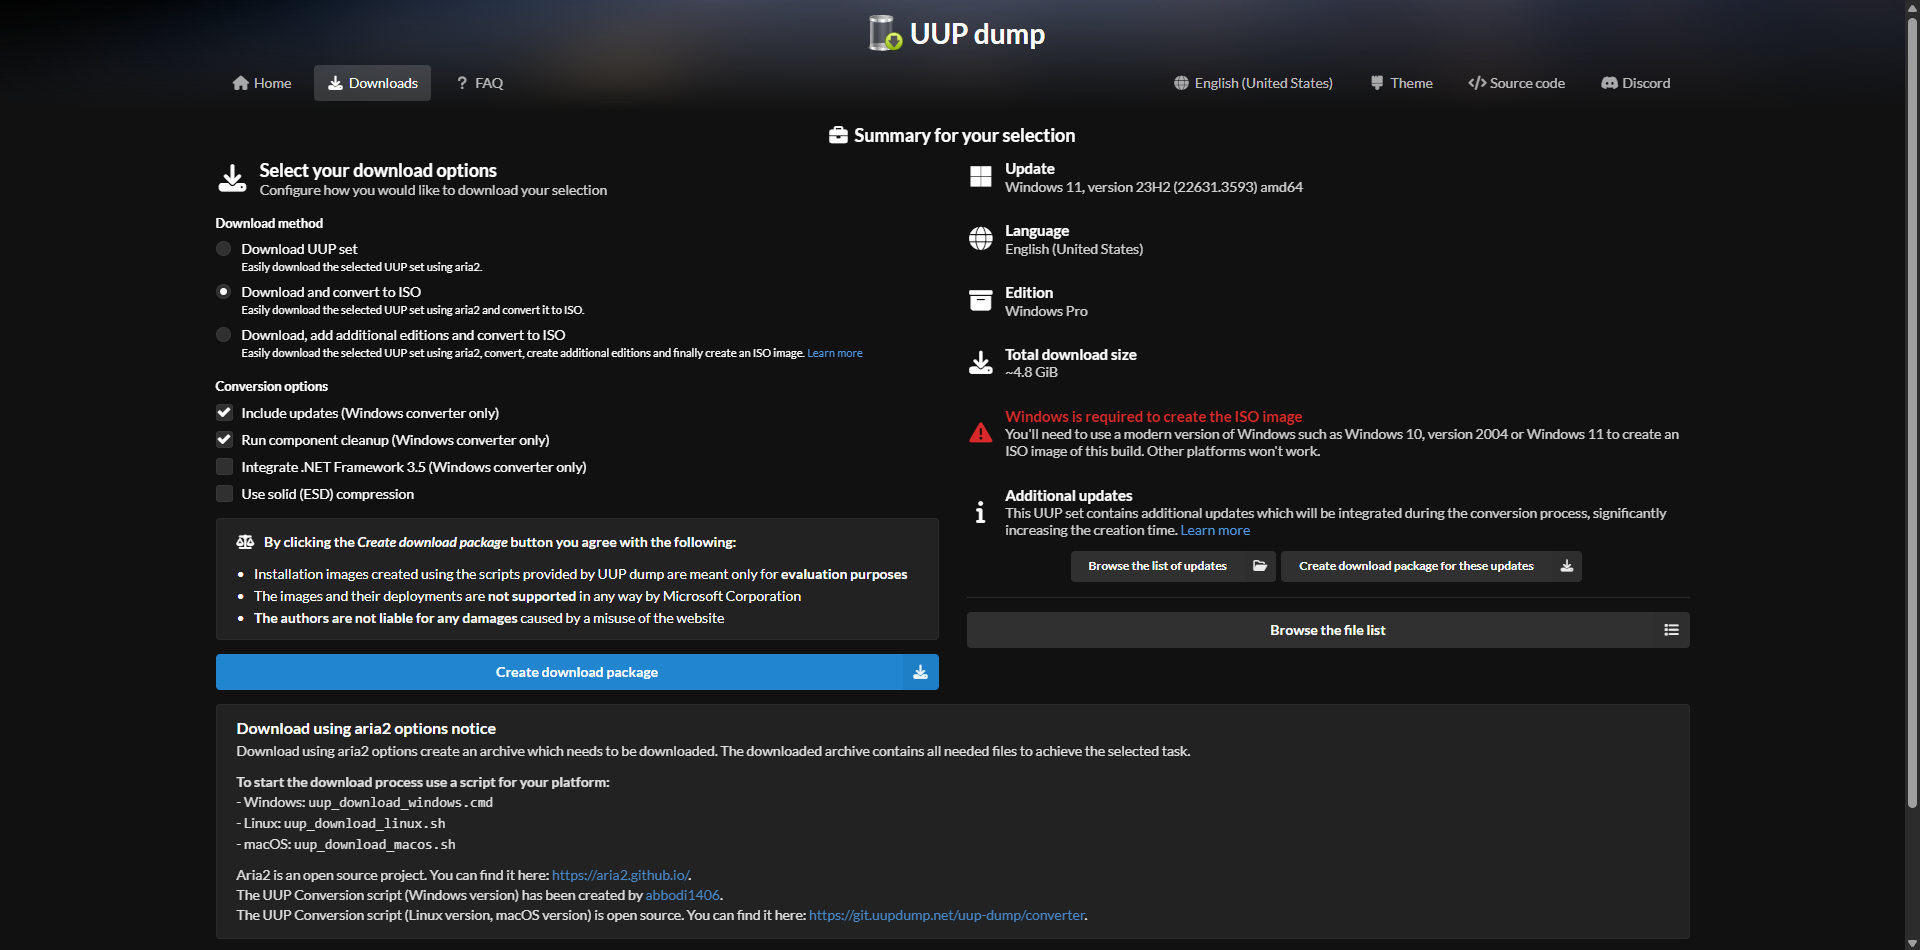
Make sure it’s “Download and convert to ISO” and Create download package. This will download a small zip file.
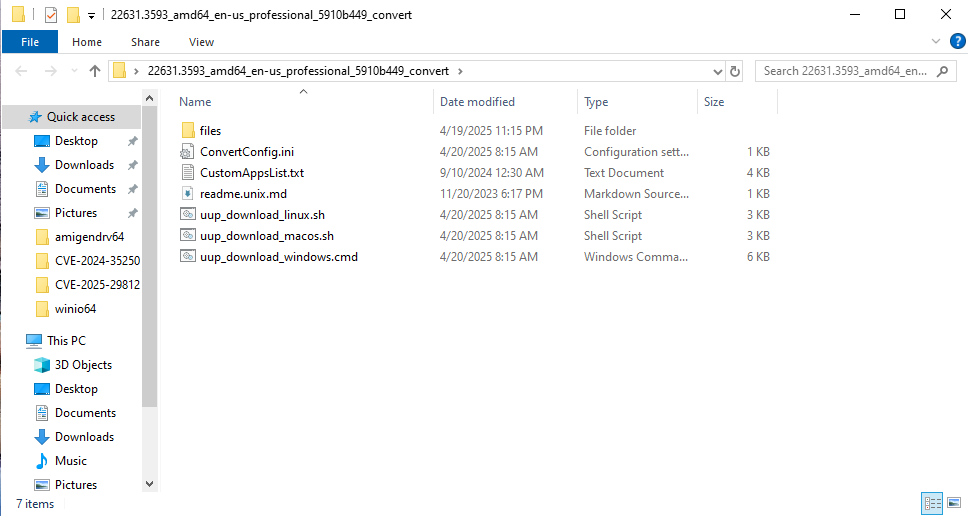
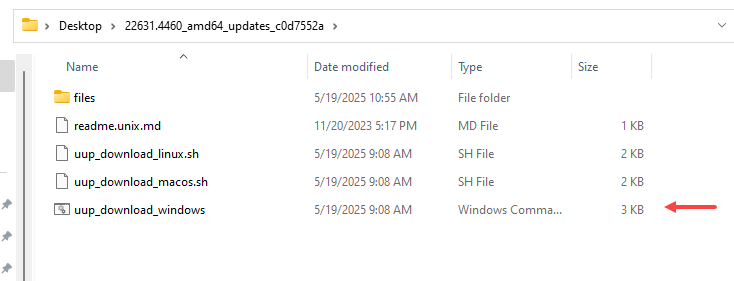
Extract the files and this is what inside, based on the platform run the scripts, this will create the ISO file.
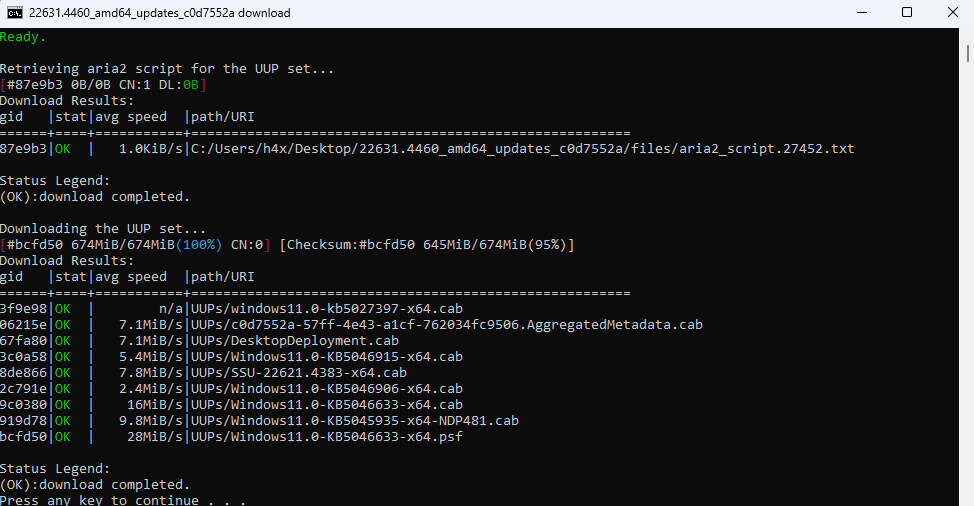
I ran uup_download_windows.cmd and it initiated the process.
It took a while but it created the ISO file:
If you check the folder now, the ISO file is ready. You can now use it to install the older version of Windows.
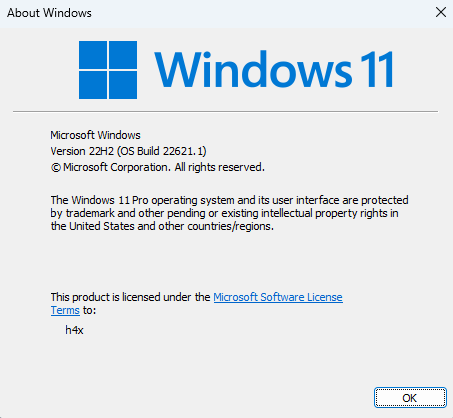
I’ve now installed the vulnerable version of Windows in a VM specifically, Windows 11 Build 22631.3593. I also verified the version of ks.sys, since it’s the vulnerable driver associated with CVE-2024-35250. In this build, the driver version is 10.0.22621.2506.
Additionally, disable the automatic Windows Updates:
reg add "HKLM\SOFTWARE\Policies\Microsoft\Windows\WindowsUpdate\AU" /v NoAutoUpdate /t REG_DWORD /d 1 /f
sc config wuauserv start= disabled
net stop wuauserv
To obtain the patched version of the driver for patch diffing, it can be easily found on Winbindex for the vulnerable ks.sys driver. The vulnerable version 10.0.22621.2506 corresponds to the May 2024 update, while the June 2024 Patch Tuesday update version is 10.0.22621.3733. The patched version was downloaded for further analysis. With the environment now set up, research can begin.

Extra
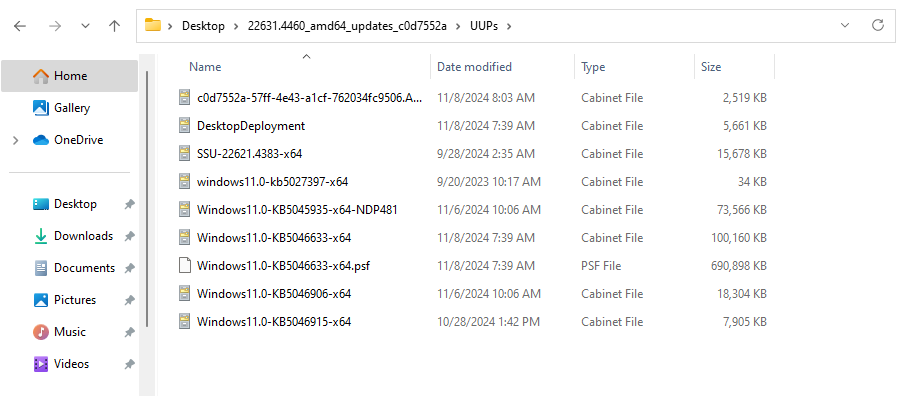
Sometimes, the build installed from the ISO ends up being a base version like this:
If that’s the case then you need to download the update package from UUP dump:
Execute the .cmd file, this will download the specific build packages.
This creates a folder called UUPs and it contains the update package of the specific build.
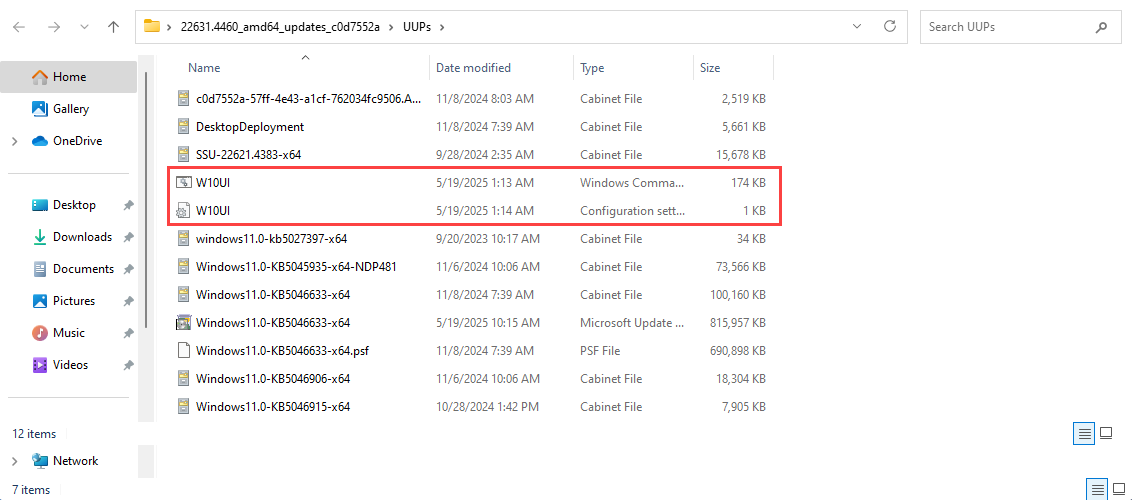
Download this specific tool under UUPs folder: https://github.com/abbodi1406/BatUtil/tree/master/W10UI and execute the “.bat” script as Administrator, this will upgrade the machine from the base version to the specific build. And finally reboot the machine.
This issue might have occurred for various reasons, but one possible cause is that the drive may have insufficient space. Make sure you always have more than 30GB of free space when using UUPDump.
It’s always a good idea to take a snapshot of the base Windows version, as it makes switching between different builds easier without having to create an ISO each time.
Automatic Windows Install - VMWare
Installing Windows in the VM every time is really time-consuming and boring, but we can easily automate the entire installation process. To do that, we will use Answer files (also known as unattend files).
Autounattend.xml is an unattended setup file used to automate the installation of Windows operating systems. It lets you predefine settings like language, disk partitioning, product key, user accounts, and more, so the installation runs without user interaction.
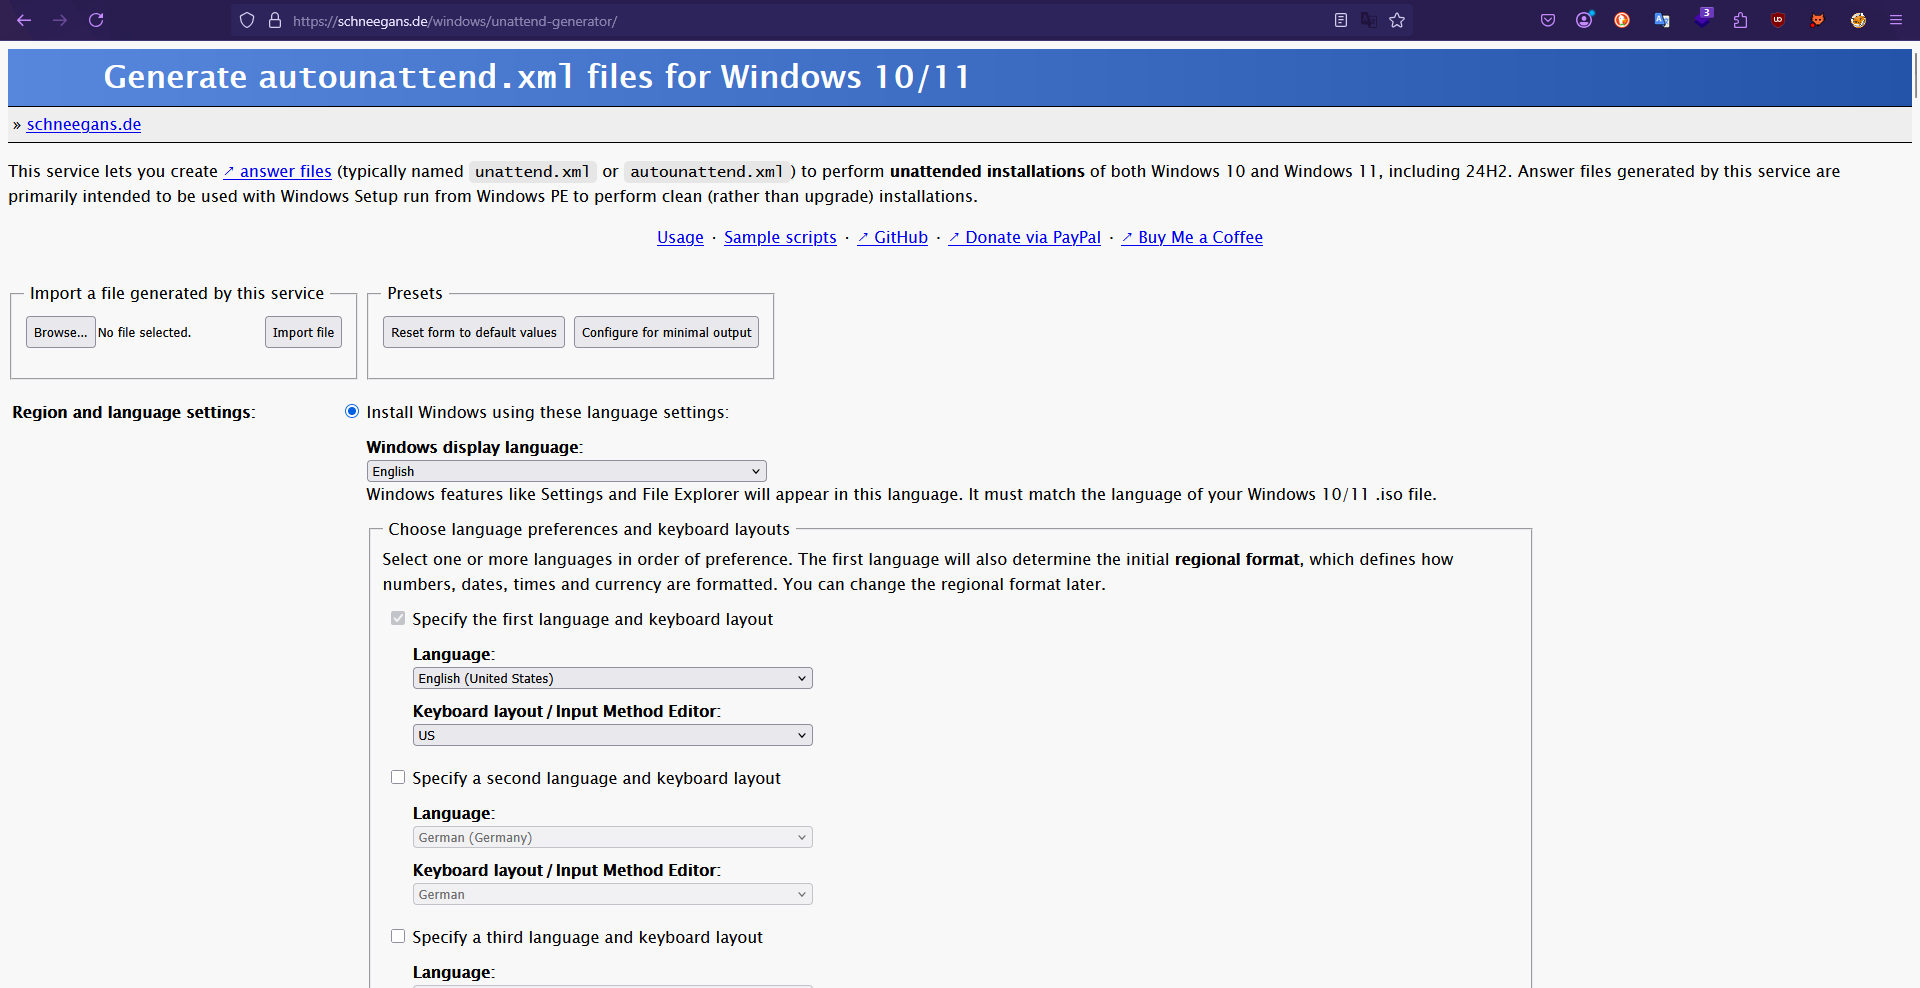
I found this awesome website that helps generate the XML file: https://schneegans.de/windows/unattend-generator/
Below are some of the settings I opted for:
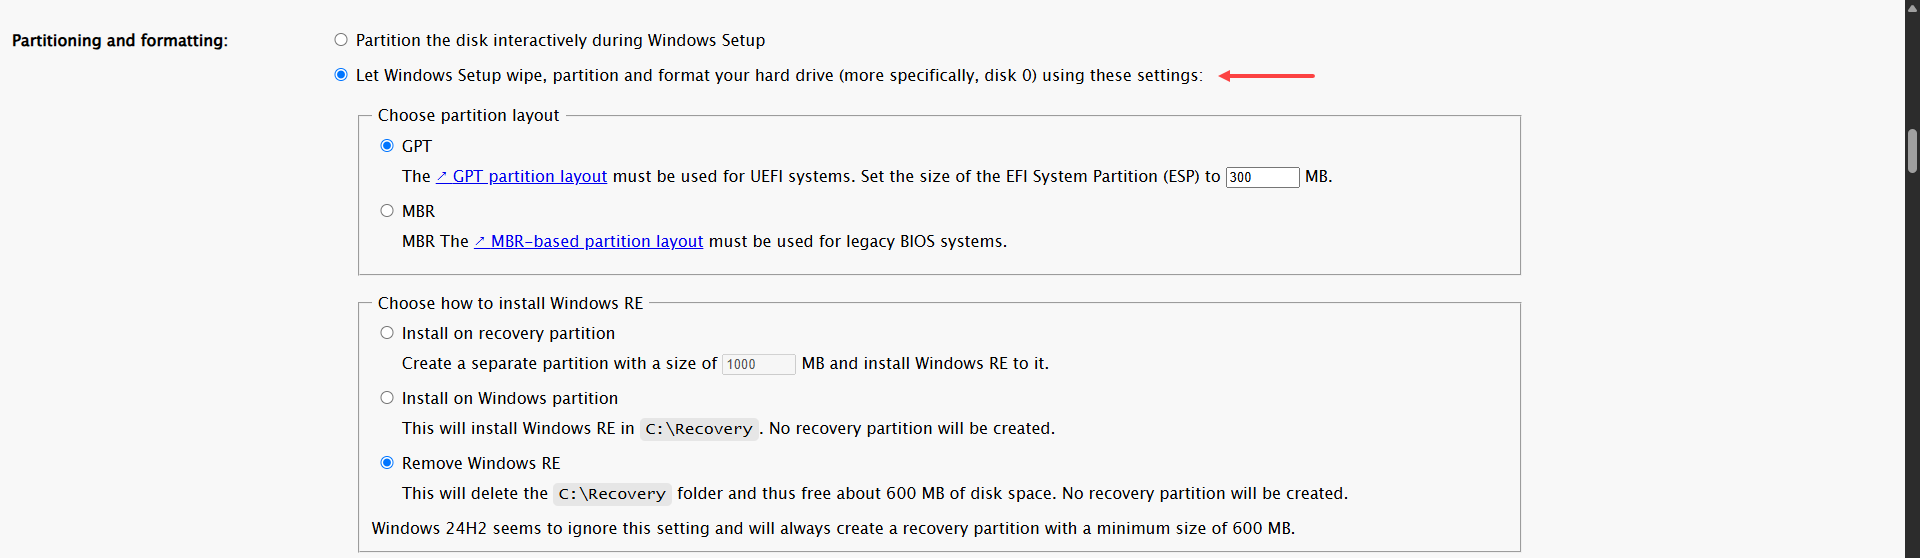
To begin with, I chose to automatically handle partitioning and formatting during the installation process, instead of being prompted interactively.
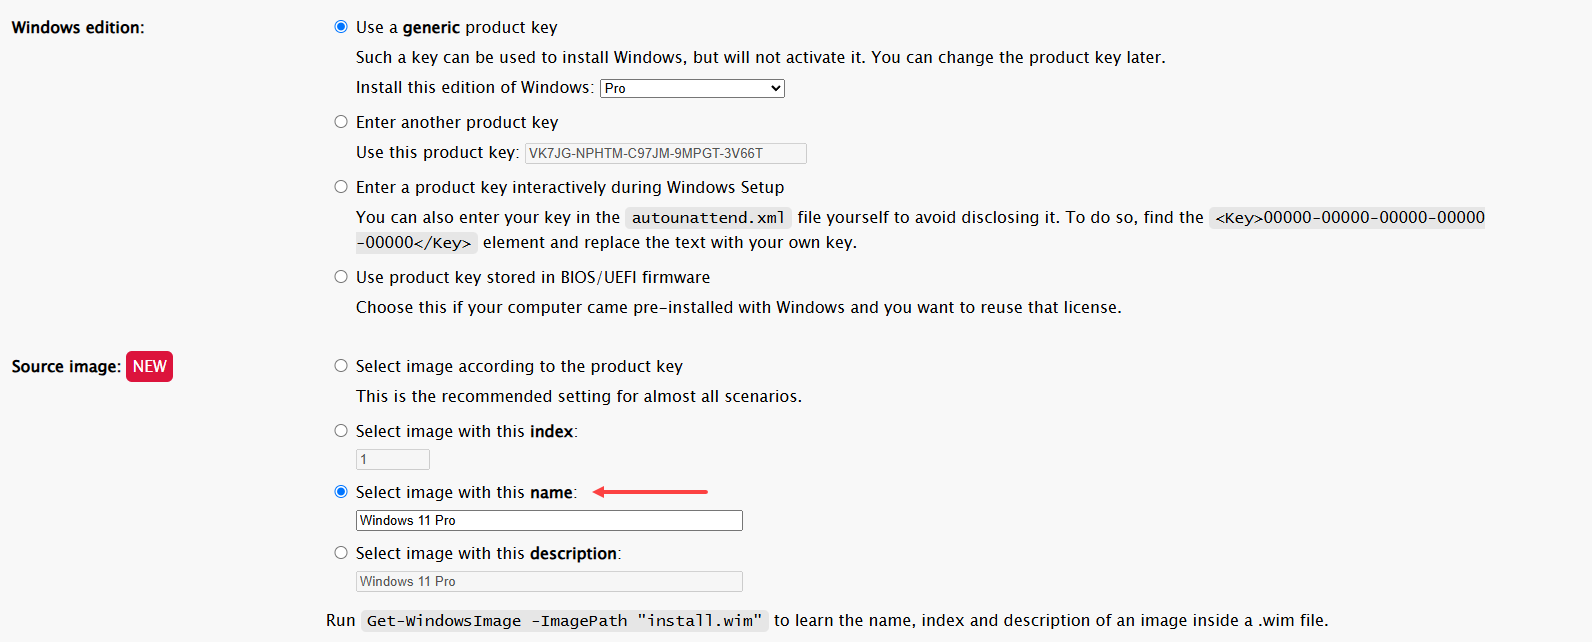
Instead of asking me interactively each time to choose the Windows edition, I set the default to “Windows 11 Pro” since that’s what I usually use. If it's not found during installation, it will prompt me to select the OS manually.
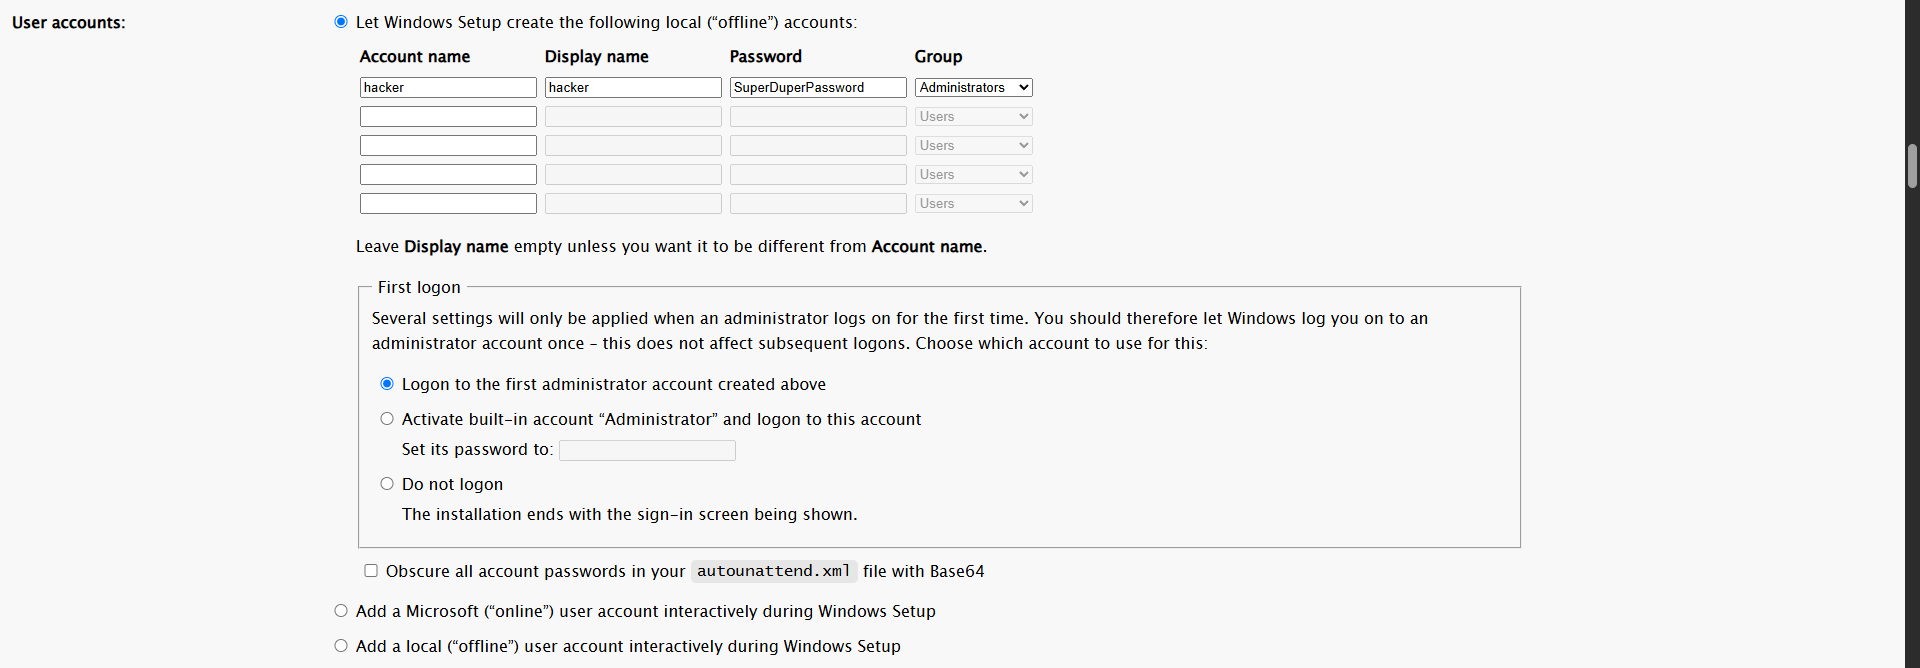
For the user account creation, I created a random account and added it to the Local Administrators group.
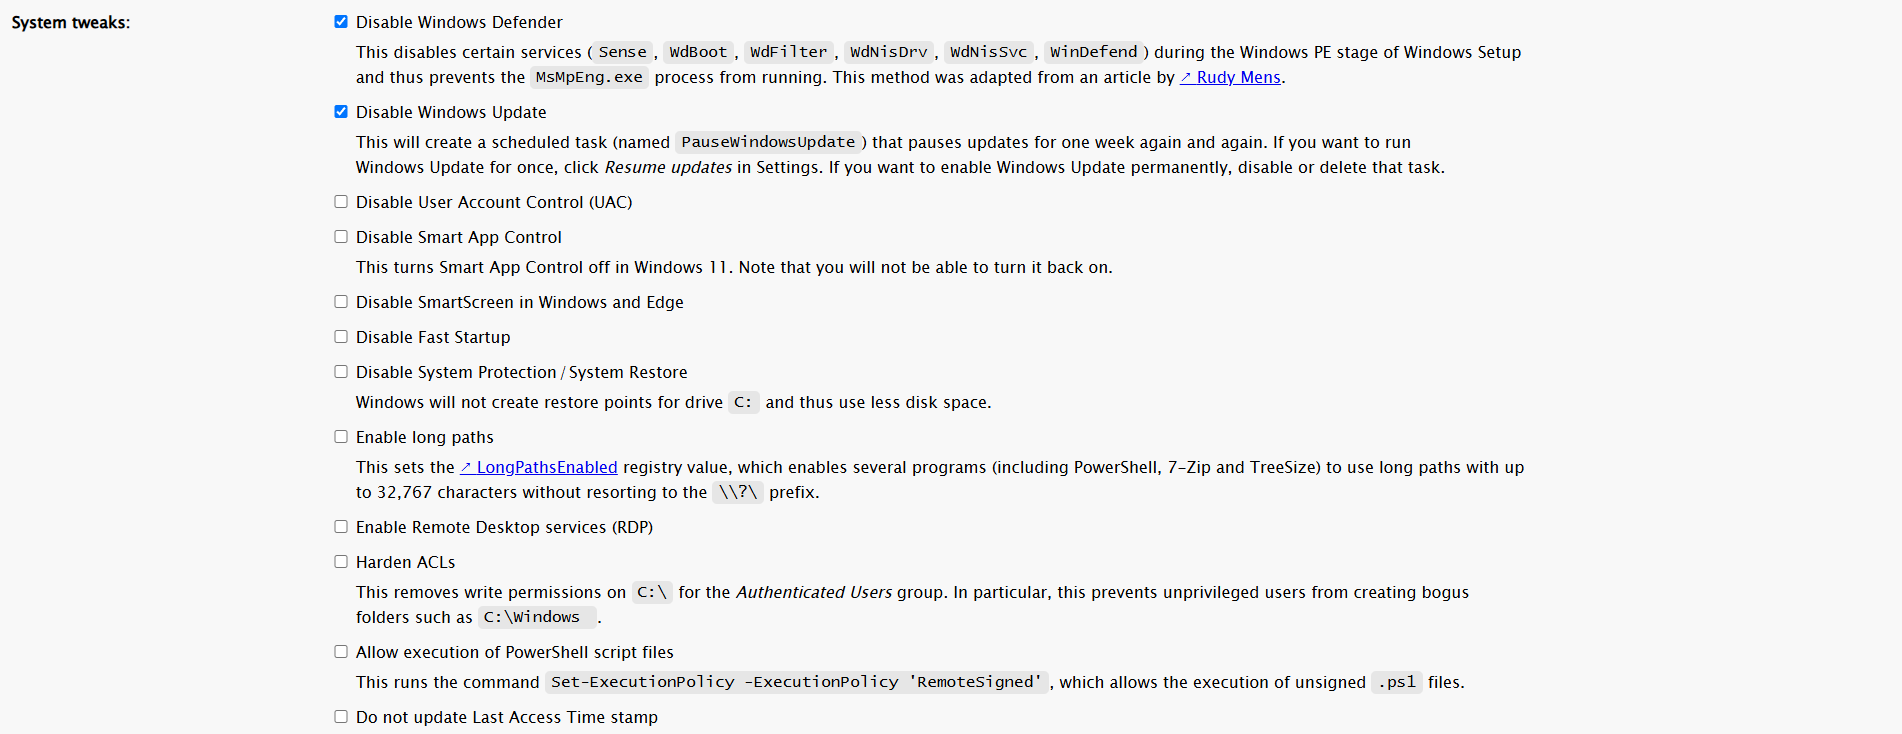
Then, I disabled Windows Defender and Windows Update so that I can focus on reversing and experimenting with vulnerable drivers or services.
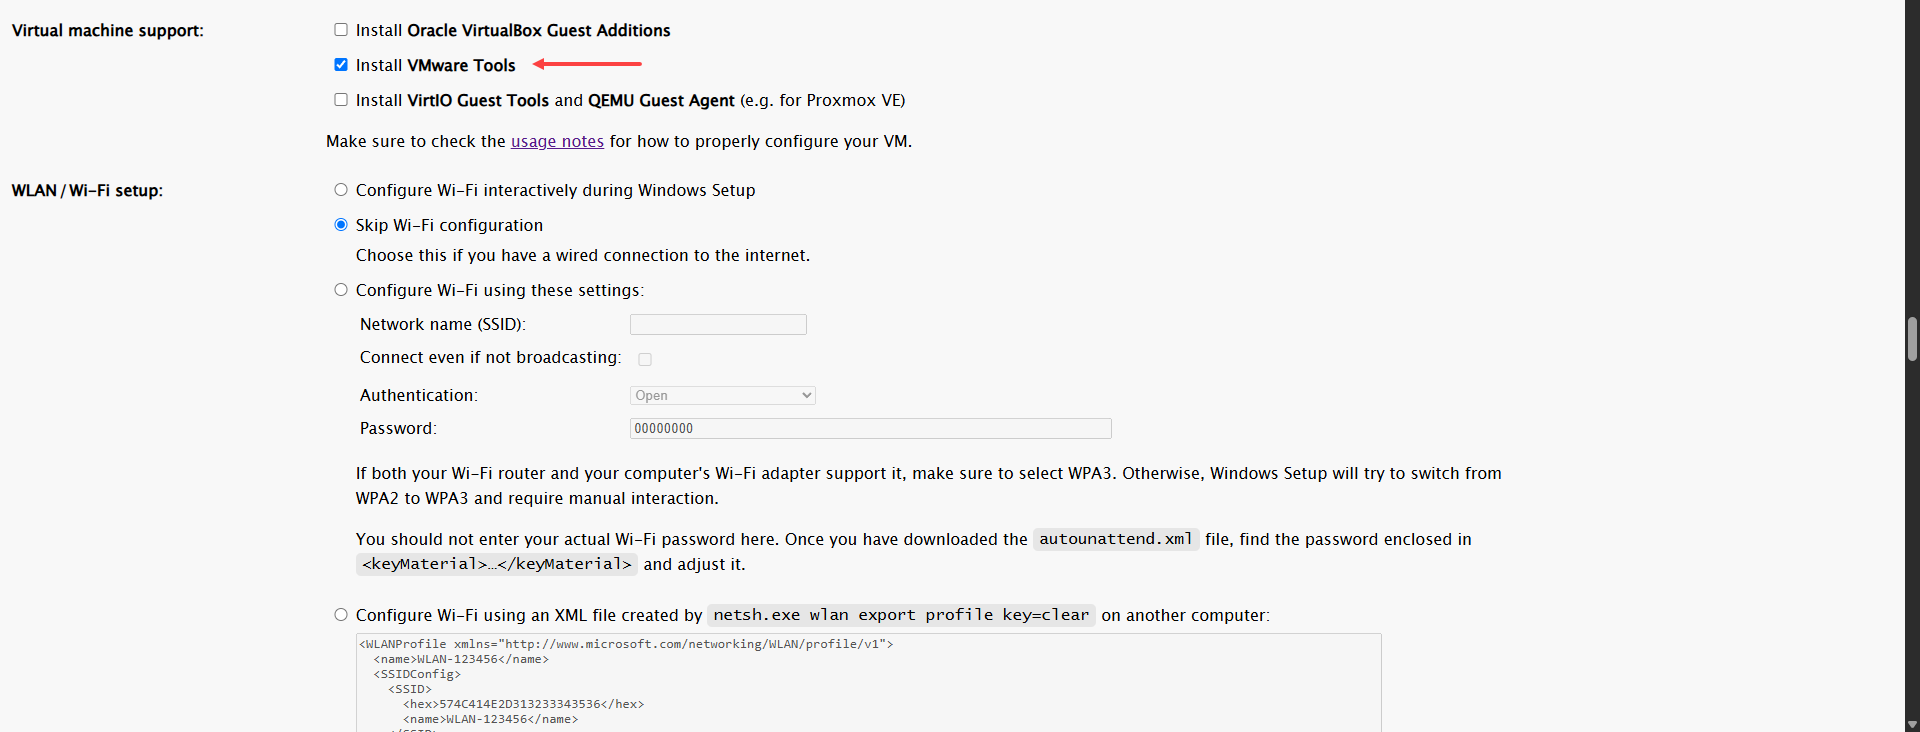
Since I’m using VMware, I want to install the guest additions as well, so I selected that option here.
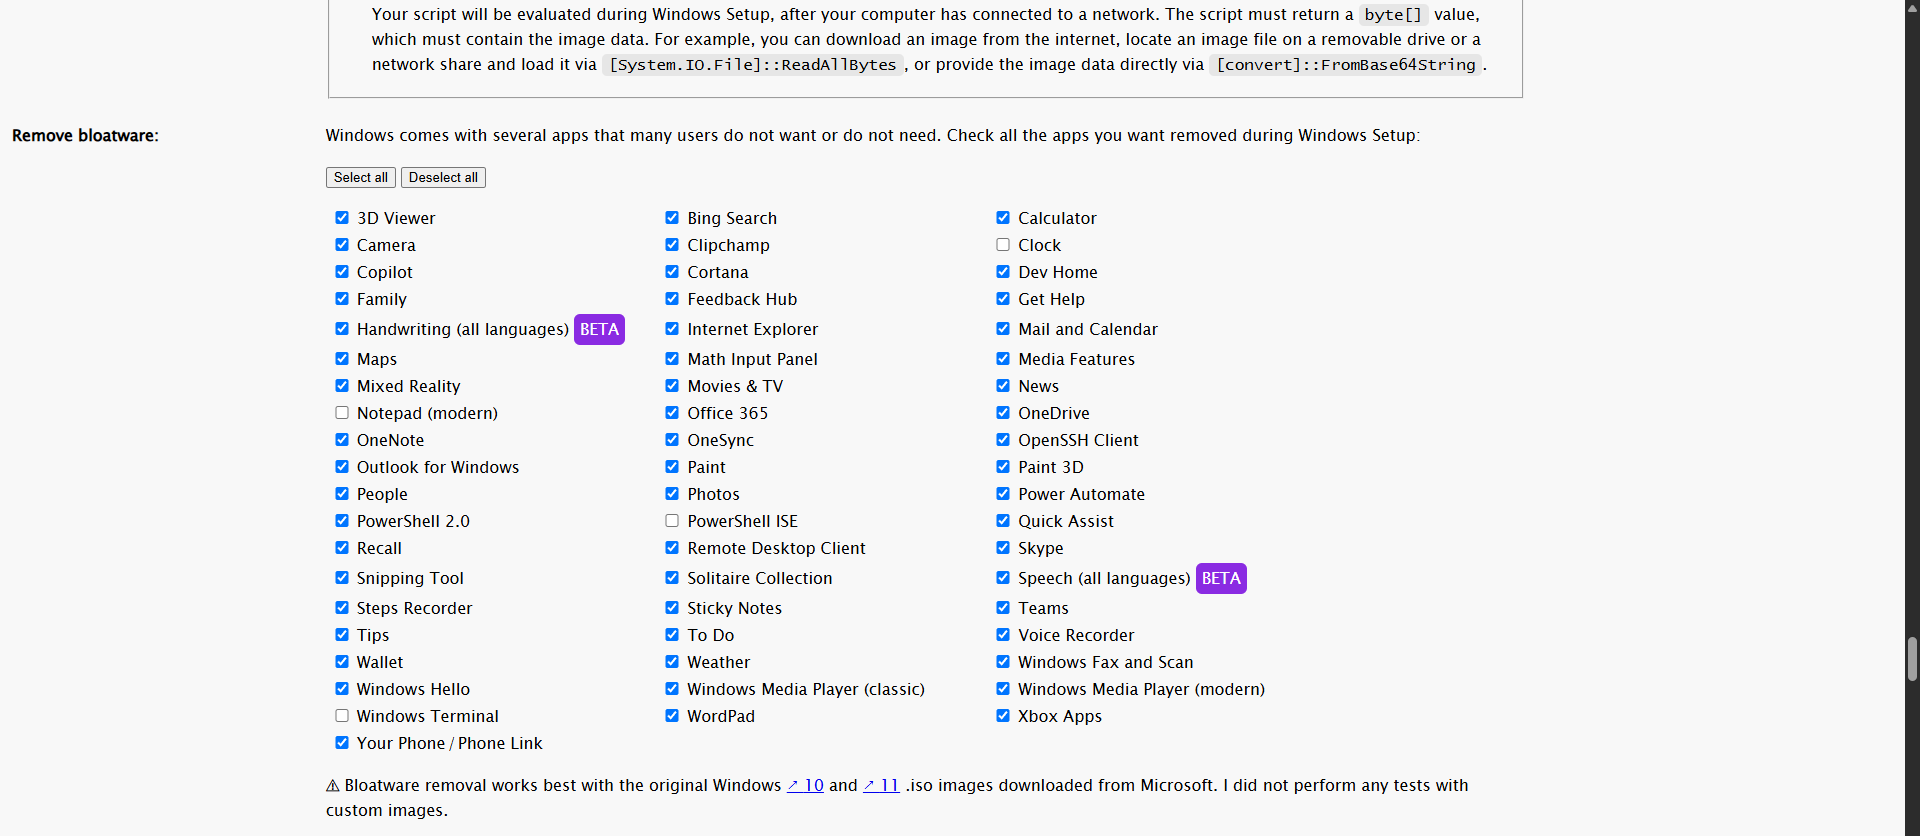
We can remove the apps in the fresh install, I removed almost all the default ones except for a few.
Then, we have an option to run custom scripts during the first boot as the System account. Here, I am executing some commands, which I explain below:
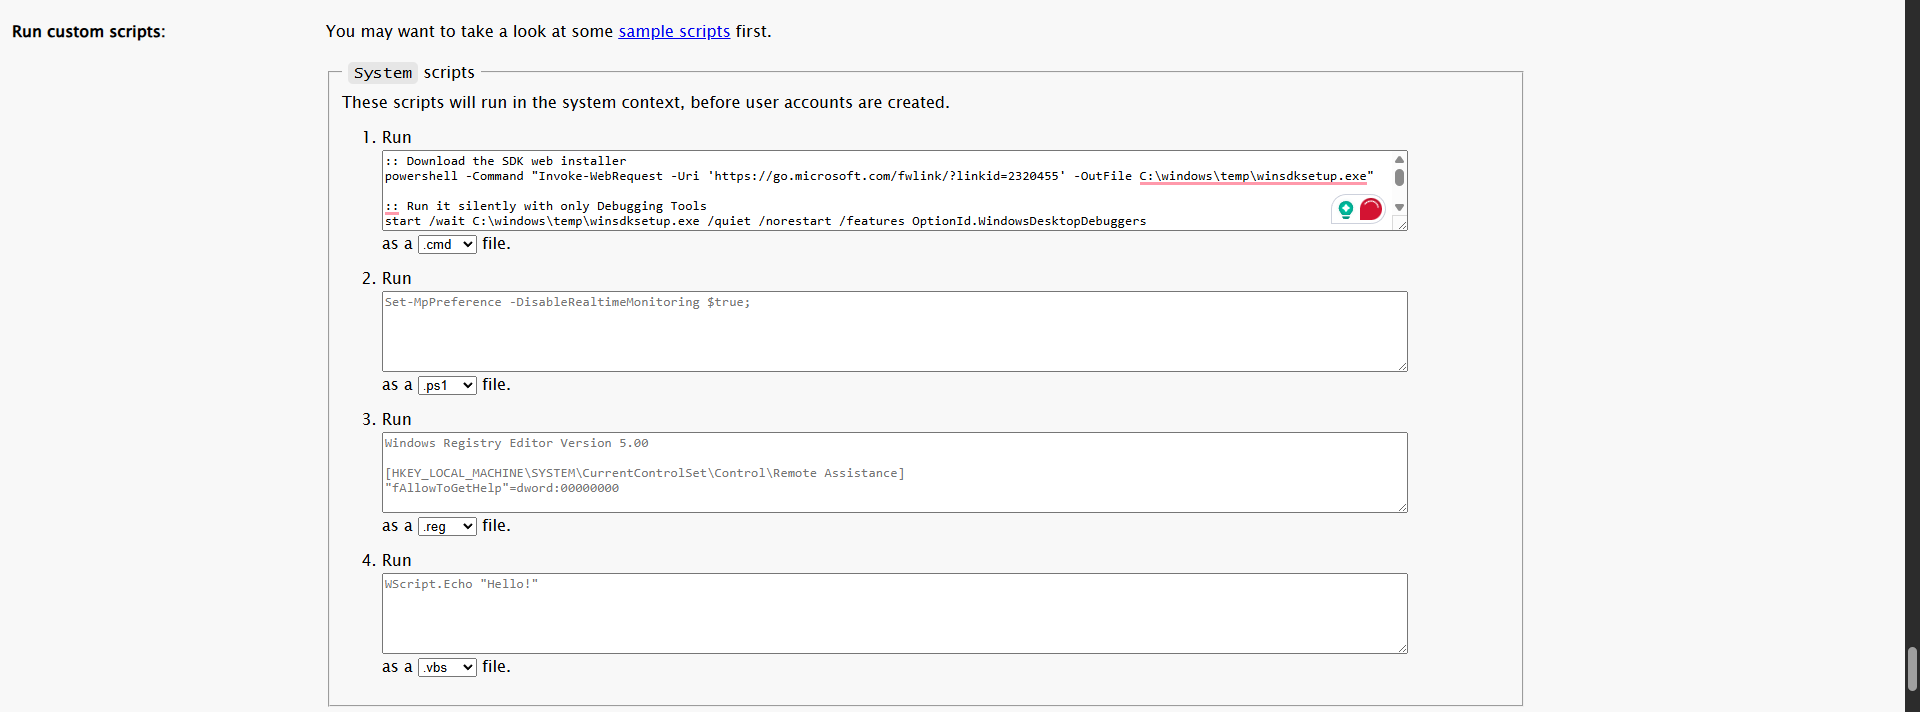
Basically, I am downloading the latest Windows SDK and installing it with the debugging tools option enabled. Following that, I disable Windows Update just in case, and enable debug mode and test signing mode since this is a test environment. Once the SDK is installed, it will include debugging tools such as kdnet.exe for remote kernel debugging, and the key will be stored under the C:\ directory. Finally, the machine will reboot.
:: Download the SDK web installer
powershell -Command "Invoke-WebRequest -Uri 'https://go.microsoft.com/fwlink/?linkid=2320455' -OutFile C:\windows\temp\winsdksetup.exe"

:: Run it silently with only Debugging Tools
start /wait C:\windows\temp\winsdksetup.exe /quiet /norestart /features OptionId.WindowsDesktopDebuggers

:: Disable Updates
reg add "HKLM\SOFTWARE\Policies\Microsoft\Windows\WindowsUpdate\AU" /v NoAutoUpdate /t REG_DWORD /d 1 /f
sc config wuauserv start= disabled
net stop wuauserv

:: Enable Debug Mode
bcdedit /debug on
bcdedit /set testsigning on

:: Run kdnet
"C:\Program Files (x86)\Windows Kits\10\Debuggers\x64\kdnet.exe" 192.168.200.131 50000 > C:\kdnet_output.txt 2>&1

:: Cleanup / reboot
shutdown /r /t 5
In the end, we can generate the ISO file directly, which is very convenient, and also obtain the XML file right away.
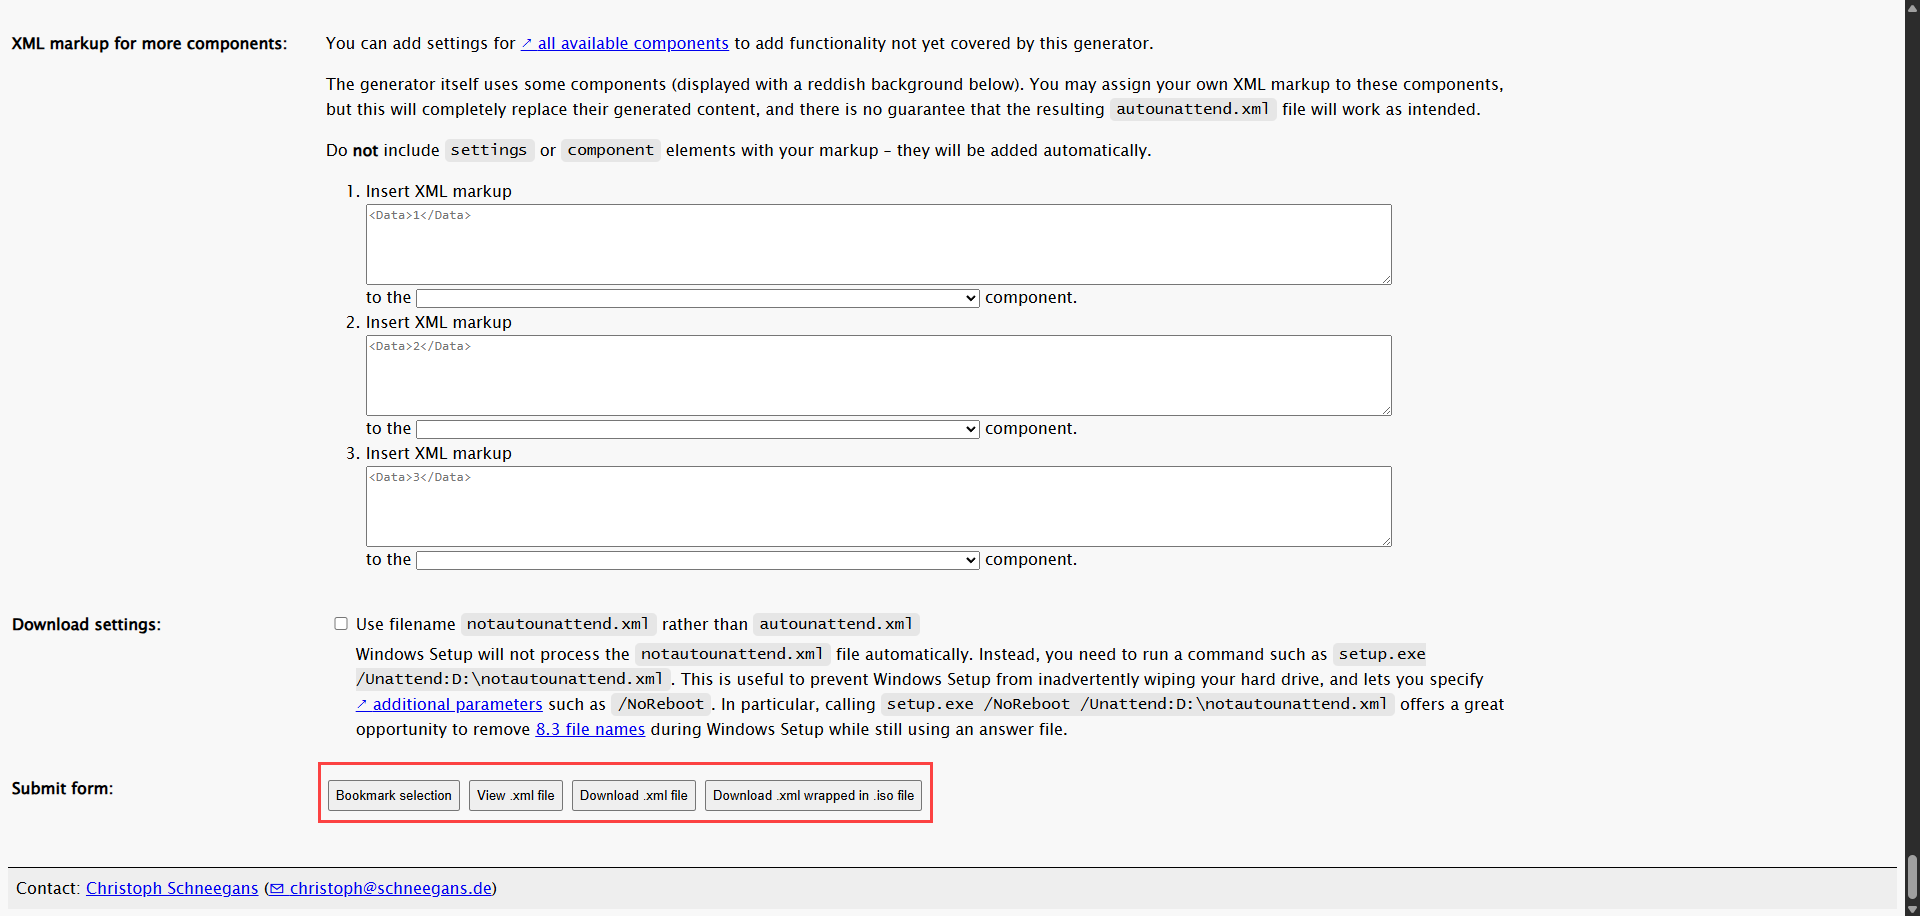
Here is my XML:
https://schneegans.de/windows/unattend-generator/view/?LanguageMode=Unattended&UILanguage=en-US&Locale=en-US&Keyboard=00000409&GeoLocation=244&ProcessorArchitecture=amd64&BypassRequirementsCheck=true&BypassNetworkCheck=true&ComputerNameMode=Random&CompactOsMode=Default&TimeZoneMode=Implicit&PartitionMode=Unattended&PartitionLayout=GPT&EspSize=300&RecoveryMode=None&DiskAssertionMode=Skip&WindowsEditionMode=Generic&WindowsEdition=pro&InstallFromMode=Name&InstallFromName=Windows+11+Pro&UserAccountMode=Unattended&AccountName0=hacker&AccountDisplayName0=hacker&AccountPassword0=SuperDuperPassword&AccountGroup0=Administrators&AutoLogonMode=Own&PasswordExpirationMode=Unlimited&LockoutMode=Disabled&HideFiles=Hidden&ShowFileExtensions=true&TaskbarSearch=Hide&TaskbarIconsMode=Default&DisableWidgets=true&DisableBingResults=true&StartTilesMode=Default&StartPinsMode=Empty&DisableDefender=true&DisableWindowsUpdate=true&HideEdgeFre=true&DisableEdgeStartupBoost=true&EffectsMode=Default&DesktopIconsMode=Default&VMwareTools=true&WifiMode=Skip&ExpressSettings=DisableAll&KeysMode=Skip&StickyKeysMode=Default&ColorMode=Default&WallpaperMode=Default&Remove3DViewer=true&RemoveBingSearch=true&RemoveCalculator=true&RemoveCamera=true&RemoveClipchamp=true&RemoveCopilot=true&RemoveCortana=true&RemoveDevHome=true&RemoveFamily=true&RemoveFeedbackHub=true&RemoveGetHelp=true&RemoveHandwriting=true&RemoveInternetExplorer=true&RemoveMailCalendar=true&RemoveMaps=true&RemoveMathInputPanel=true&RemoveMediaFeatures=true&RemoveMixedReality=true&RemoveZuneVideo=true&RemoveNews=true&RemoveOffice365=true&RemoveOneDrive=true&RemoveOneNote=true&RemoveOneSync=true&RemoveOpenSSHClient=true&RemoveOutlook=true&RemovePaint=true&RemovePaint3D=true&RemovePeople=true&RemovePhotos=true&RemovePowerAutomate=true&RemovePowerShell2=true&RemoveQuickAssist=true&RemoveRecall=true&RemoveRdpClient=true&RemoveSkype=true&RemoveSnippingTool=true&RemoveSolitaire=true&RemoveSpeech=true&RemoveStepsRecorder=true&RemoveStickyNotes=true&RemoveTeams=true&RemoveGetStarted=true&RemoveToDo=true&RemoveVoiceRecorder=true&RemoveWallet=true&RemoveWeather=true&RemoveFaxAndScan=true&RemoveWindowsHello=true&RemoveWindowsMediaPlayer=true&RemoveZuneMusic=true&RemoveWordPad=true&RemoveXboxApps=true&RemoveYourPhone=true&SystemScript0=%3A%3A+Download+the+SDK+web+installer%0D%0Apowershell+-Command+%22Invoke-WebRequest+-Uri+%27https%3A%2F%2Fgo.microsoft.com%2Ffwlink%2F%3Flinkid%3D2320455%27+-OutFile+C%3A%5Cwindows%5Ctemp%5Cwinsdksetup.exe%22%0D%0A%0D%0A%3A%3A+Run+it+silently+with+only+Debugging+Tools%0D%0Astart+%2Fwait+C%3A%5Cwindows%5Ctemp%5Cwinsdksetup.exe+%2Fquiet+%2Fnorestart+%2Ffeatures+OptionId.WindowsDesktopDebuggers%0D%0A%0D%0A%3A%3A+Disable+Updates%0D%0Areg+add+%22HKLM%5CSOFTWARE%5CPolicies%5CMicrosoft%5CWindows%5CWindowsUpdate%5CAU%22+%2Fv+NoAutoUpdate+%2Ft+REG_DWORD+%2Fd+1+%2Ff%0D%0Asc+config+wuauserv+start%3D+disabled%0D%0Anet+stop+wuauserv%0D%0A%0D%0A%3A%3A+Enable+Debug+Mode%0D%0Abcdedit+%2Fdebug+on%0D%0Abcdedit+%2Fset+testsigning+on%0D%0A%0D%0A%3A%3A+Run+kdnet+and+redirect+output+to+file%0D%0A%22C%3A%5CProgram+Files+%28x86%29%5CWindows+Kits%5C10%5CDebuggers%5Cx64%5Ckdnet.exe%22+192.168.200.131+50000+%3E+C%3A%5Ckdnet_output.txt+2%3E%261%0D%0A%0D%0A%3A%3A+Cleanup+%2F+reboot%0D%0Ashutdown+%2Fr+%2Ft+5&SystemScriptType0=Cmd&WdacMode=Skip
You can replace the username and password accordingly, and make sure to update the IP address “192.168.200.131” to match your remote debugger machine’s IP.
Also, at the top, you can import an XML file. You can download mine from above and load it to edit easily and generate the ISO directly.

To use answer files (or unattend files), we need to provide them to the Windows Setup. During installation, Windows Setup automatically searches for autounattend.xml files in several locations, including the root folder of each removable drive. Now that the unattend.iso is ready, let’s proceed to the next step.
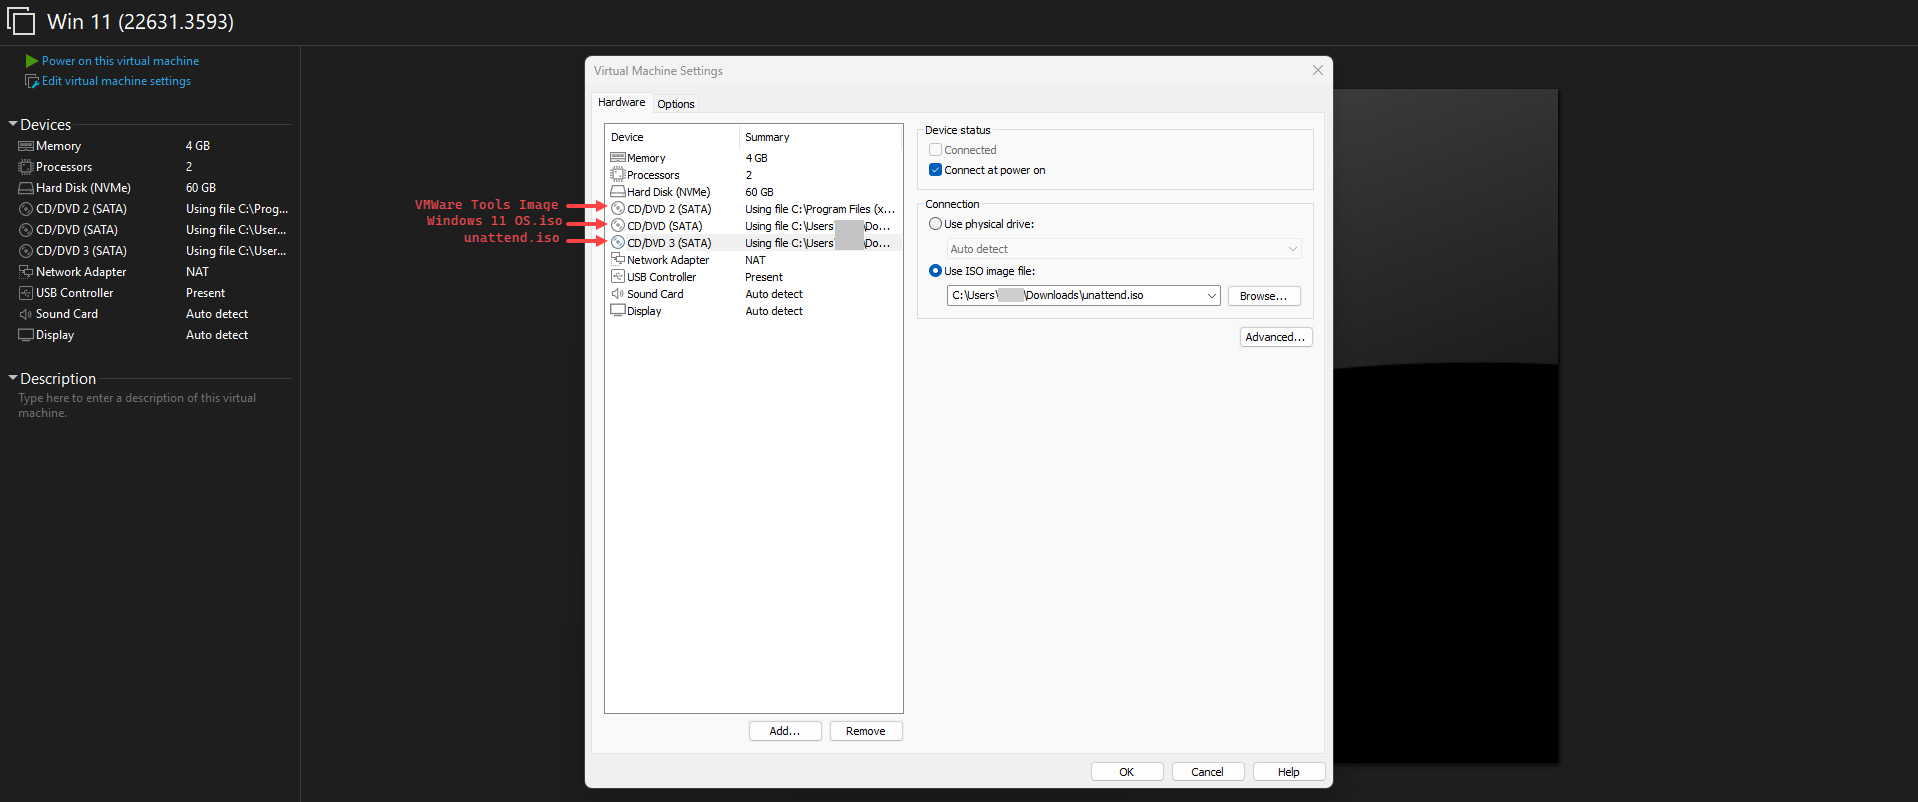
Create a new VM in VMware and add 3 CD/DVD drives:
- The first drive contains the Windows 11 OS ISO file.
- The second drive contains VMware Tools, which can be found at
C:\Program Files (x86)\VMware\VMware Workstation\windows.iso. For other hypervisors, check this documentation. - The last drive is used to load the
unattend.isofile.
Power on the virtual machine and press any key to boot from CD:

That’s all you need to do, now sit back and relax. The setup will run automatically, and Windows will be ready to use with remote debugging enabled.

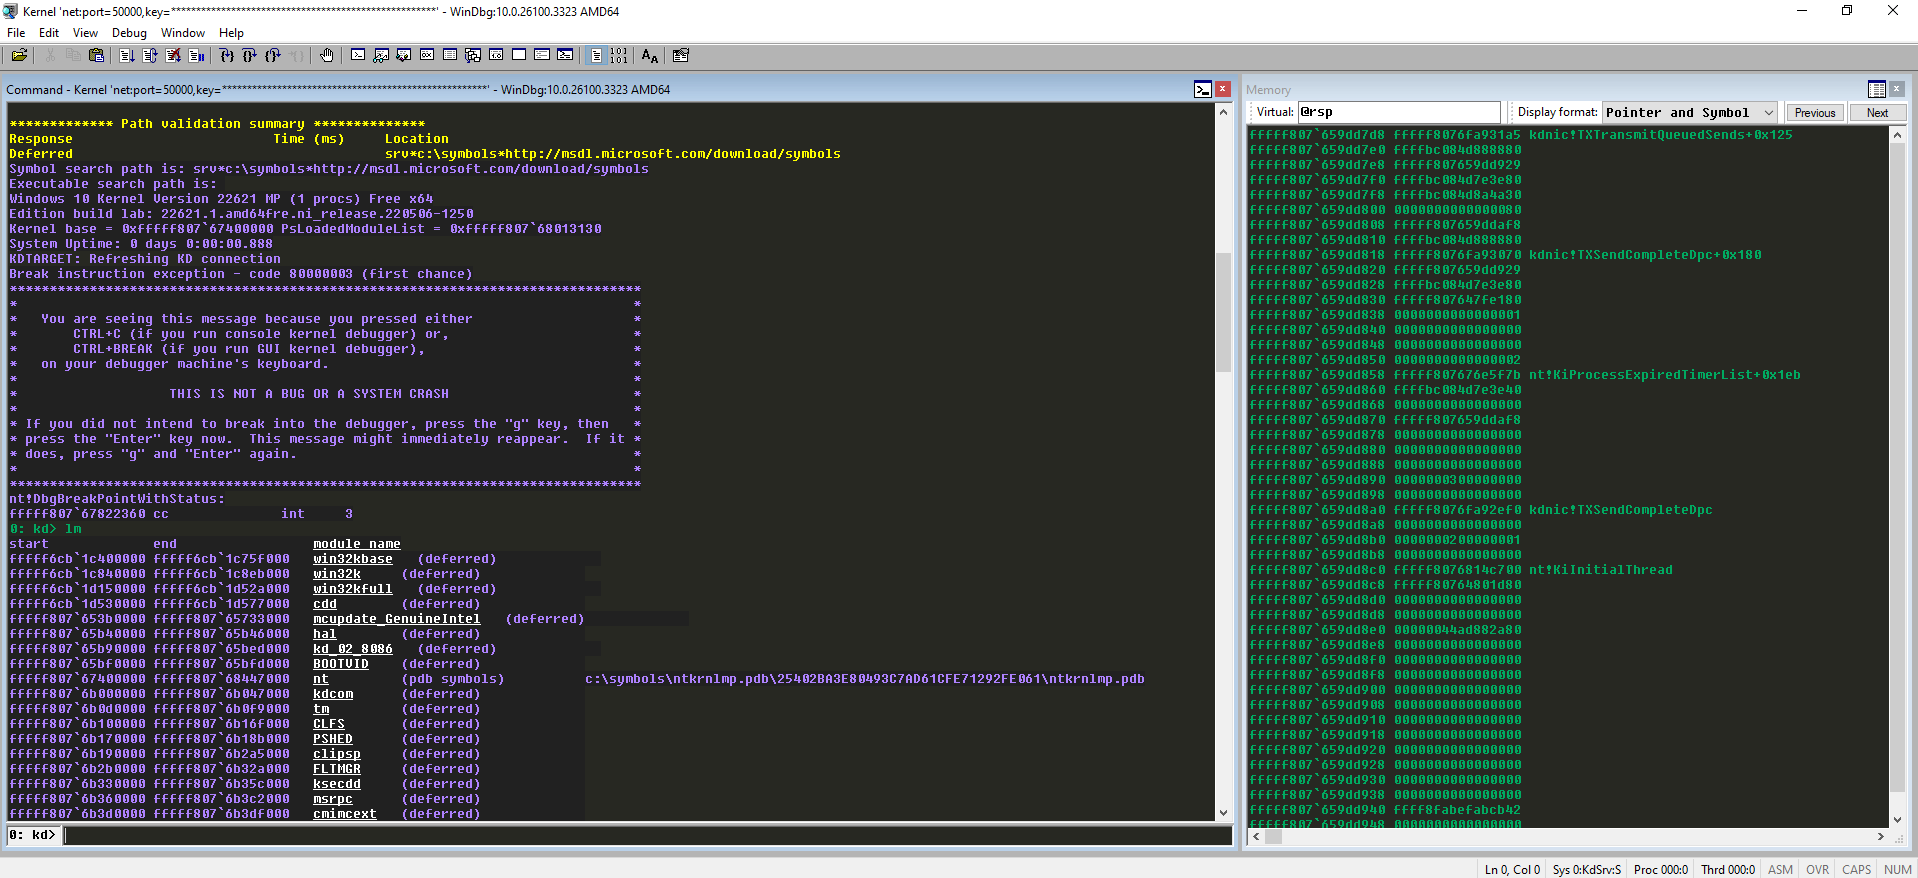
The key worked fine and connected successfully after a restart.
This approach significantly reduces the effort required to set up various Windows builds associated with different CVEs for research.